
|
Thank you, from the Foods of the World Forums! |
Eye of Round Roast, Seared and Low Slow Cooked |
Post Reply 
|
| Author | |
MarkR 
Chef 

Joined: 03 February 2011 Location: St. Pete FL Status: Offline Points: 625 |
 Post Options Post Options
") Thanks(0) Thanks(0)
 Quote Reply Quote Reply
 Topic: Eye of Round Roast, Seared and Low Slow Cooked Topic: Eye of Round Roast, Seared and Low Slow CookedPosted: 12 January 2014 at 11:26 |
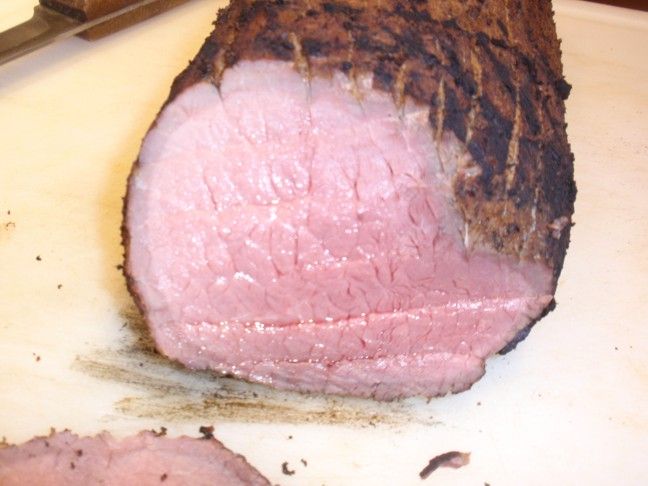 The "rub" for this recipe came from a post by African Meat , I just put it in quantities and added sea salt. The method comes from Dan Souza of Americans Test Kitchen, kind of. His recipe was for frying pan searing and an oven finishing, I adapted it for the grill and smoker!:thumb: Ingredients 5lb eye of round roast 30g extra virgin olive oil 10g (3cloves) crushed garlic, 6.3g (3tsp) hot Paprika , 8.4g (4tsp) black pepper , 4.7g (2tsp)Mustard powder, 26.6g (4tsp)Sea Salt, 21.42g (6tsp)brown sugar . 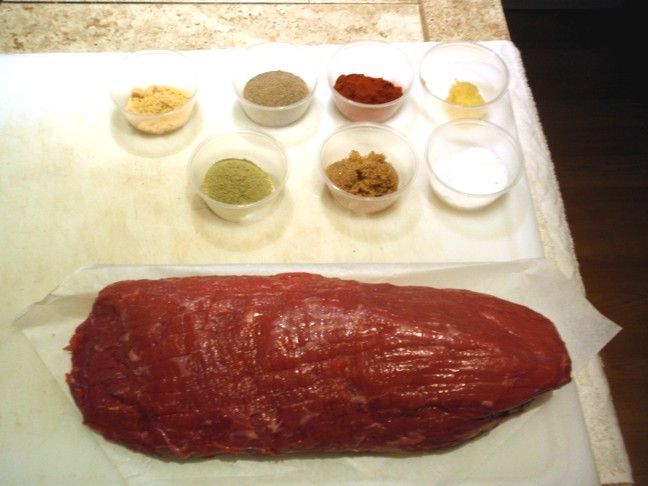 Rub the roast with the olive oil, and spices. 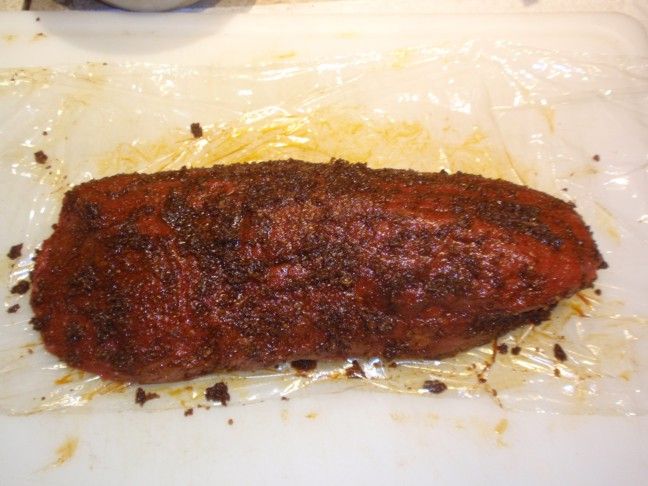 Wrap it in plastic wrap and let it rest in the fridge overnight (in a pan). The salt is going to pull the moisture out of the meat to start. Once it equalizes the meat will pull the moisture back in and the spices with it. 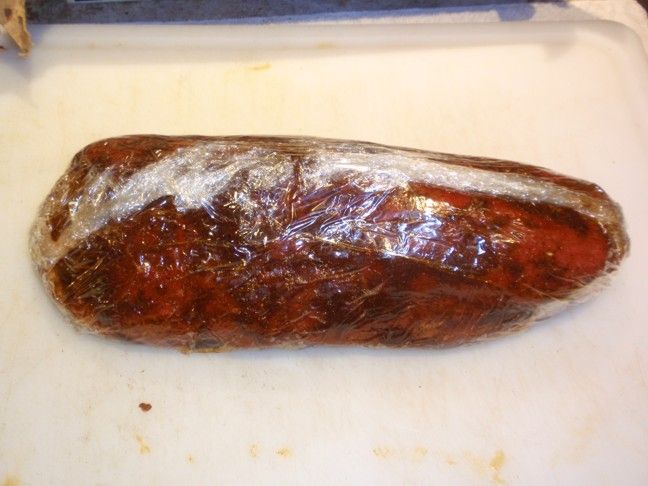 Now instead of using a frying pan we fire up 1/2 a chimney of lump and put it in the Vortex in the Weber. Take the plastic off of the meat and dispose of it. Sear the meat directly over the vortex. 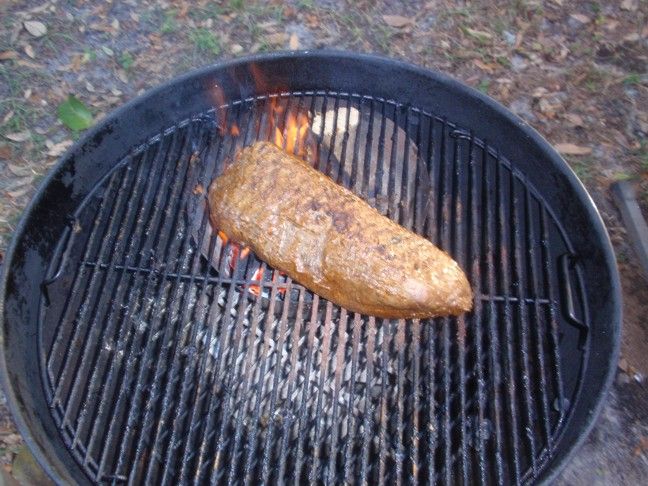 Keep it moving so you don't get any one place too "cooked". This is almost finished. And out of the Weber. 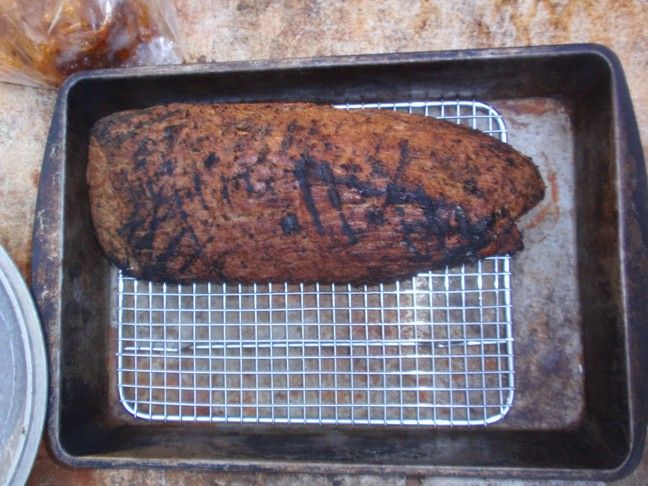 Internal temp after searing. The thermometer is a ChefAlarm from Thermoworks. It is excellent for the oven or grill, temp to 700°. Very easy to use......and big letters. 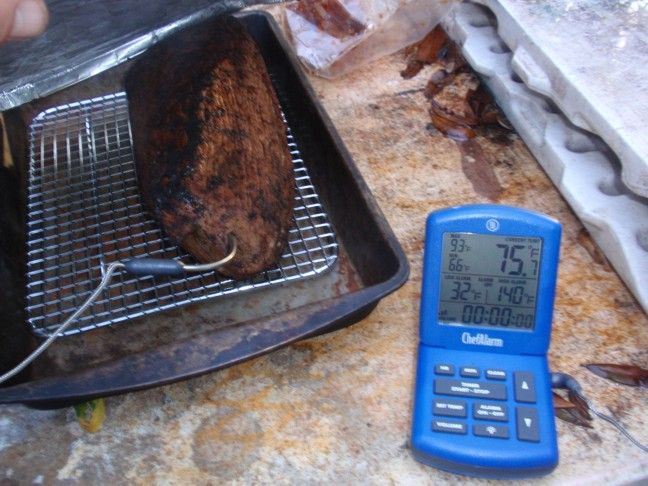 At this point the idea was to foil the meat and close the air vents on the Weber till it dropped to 225°. Then put the meat back in indirect. Butt I chickened out. I'd never tried to lower the temp that much and keep it lit, so I cheated the finish in the oven. I did tend the Weber and it would have worked just fine. I closed the vents and waited till it got back down to 225°. I opened the lid, just like I was replacing the meat, closed the lid and cracked top and bottom vents just slightly and it held there! I wish I'd had faith in the method. Yea I know I have to redo now! You will notice the baking rack under the meat, that's so the air can circulate all around the meat Anyway I put the roast in the preheated to 225° oven and roasted it for about an hour and a half, till it reached and internal temp of 115°. (Sorry forgot to take a pic) then turned the oven off, but left the roast in the oven for another 50 minutes. After 50 minutes the internal temp had risen to 130°. I removed it from the oven and let it rest for another 15 minutes. 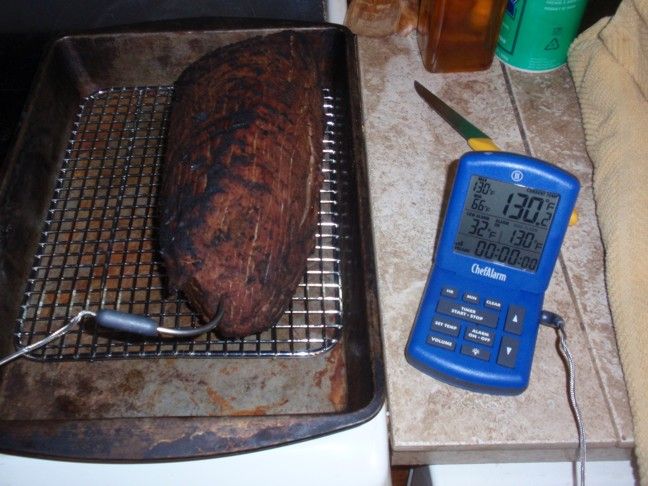 Notice there is no liquid in the baking pan, no residue. The moisture is all still in the meat. 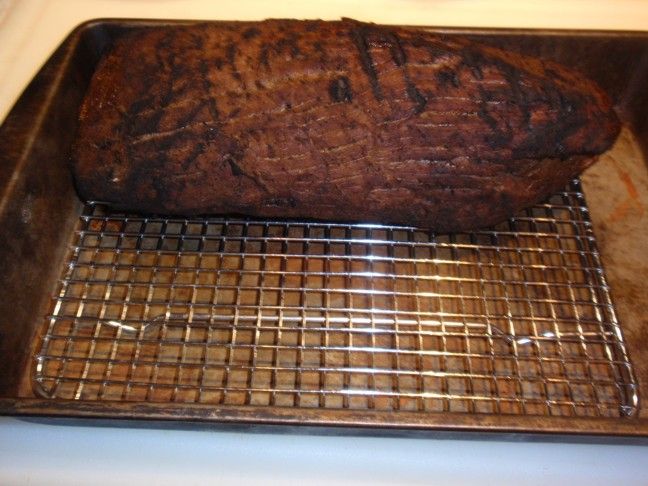 And the first couple slices! Notice again, no juice on the cutting board. 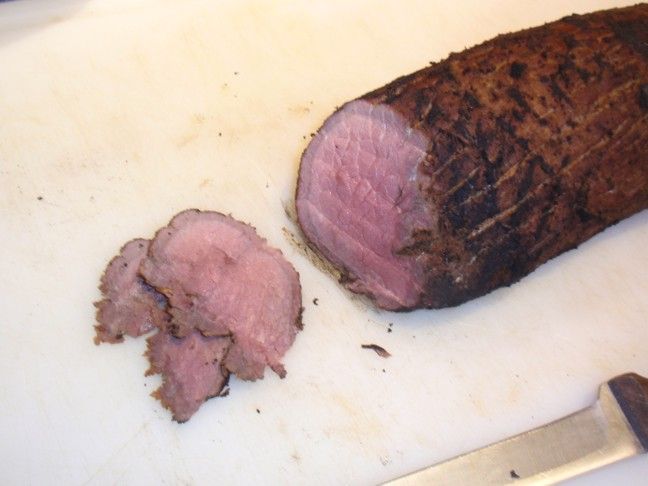 The ring is the "well" done part from searing, normally that would have extended much farther in to the meat. It would have worked just fine on the Weber as well, but I know I have to redo....So I will!:thumb: Damn good eats, almost as tender as filet! The idea is to keep the internal temp under 122° as long as possible. That's the point that the natural enzymes in the meat stop tenderizing the meat like in dry aging. |
|
|
Mark R
|
|
 |
|
| Sponsored Links | |
|
|
|
TasunkaWitko
Admin Group 

Joined: 25 January 2010 Location: Chinook, MT Status: Offline Points: 9389 |
Post Options
Thanks(0)
Quote Reply
Posted: 12 January 2014 at 13:21 |
|
That really does look just about perfect, Mark. Beautiful colour inside and outside!
Some really good points on technique, as well - thank you for posting! |
|
|
If you are a visitor and like what you see, please click here and join the discussions in our community!
|
|
|
|
|
gracoman
Chef
Joined: 09 August 2013 Status: Offline Points: 887 |
Post Options
Thanks(0)
Quote Reply
Posted: 12 January 2014 at 18:02 |
|
Interesting method that obviously works, and works well.
Have you tried sous vide first with a sear afterwards? Or a low temp smoke, sous vide, and then sear? I'm close to purchasing the Anova circulator and have been wondering about your experience with the new toy. The pics you have posted look very much like a sous vide round. |
|
|
|
|
MarkR
Chef
Joined: 03 February 2011 Location: St. Pete FL Status: Offline Points: 625 |
Post Options
Thanks(0)
Quote Reply
Posted: 12 January 2014 at 19:10 |
|
|
|
Mark R
|
|
|
|
|
Post Reply
|
|
 Tweet
Tweet
|
| Forum Jump | Forum Permissions You cannot post new topics in this forum You cannot reply to topics in this forum You cannot delete your posts in this forum You cannot edit your posts in this forum You cannot create polls in this forum You cannot vote in polls in this forum |


 Topic Options
 gracoman wrote: