|
Thank you, from the Foods of the World Forums! |
Bresaola di Cervo |
Post Reply 
|
Page 12> |
| Author | ||
TasunkaWitko 
Admin Group 

Joined: 25 January 2010 Location: Chinook, MT Status: Offline Points: 9389 |
 Post Options Post Options
") Thanks(0) Thanks(0)
 Quote Reply Quote Reply
 Topic: Bresaola di Cervo Topic: Bresaola di CervoPosted: 28 February 2013 at 15:29 |
|
|
Bresaola di Cervo In case you're wondering what bresaola is, here is a fairly comprehensive overview, from Wikipedia, with some photos from various internet sources: http://en.wikipedia.org/wiki/Bresaola
In addition to the examples enumerated above, there is another similar charcuterie product that I have had some experience with: Romanian pastramă:
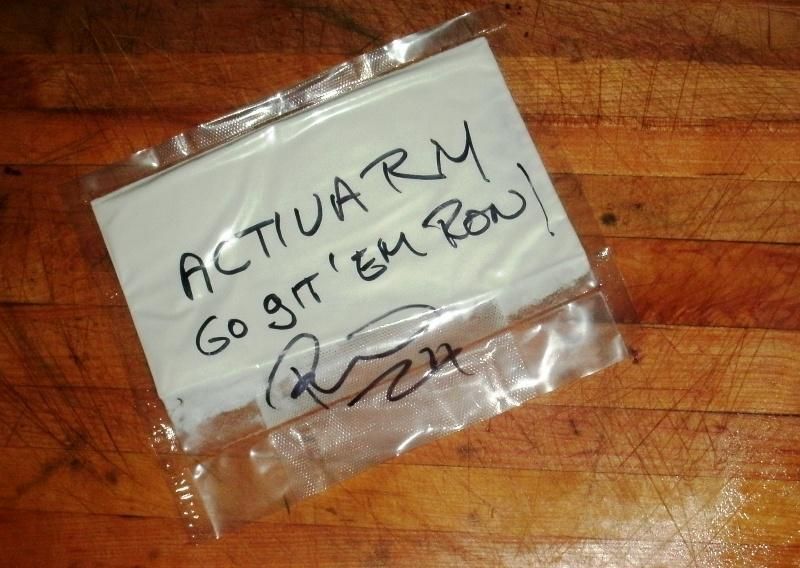
http://foodsoftheworld.activeboards.net/project-pastram_topic917.html With an interest in charcuterie, as well as international foods, it was only a matter of time before I gave this Italian specialty a try. I decided to make it from venison, an abundant, local source of meat that never fails to please; I had two venison roasts in the freezer; however, they were each only a pound in weight, so I decided to incorporate another experiment that I've been meaning to try: a little something called "Activa RM," otherwise known as "meat glue." My intention was to use a little bit of technology in order to bond the two smallish venison roasts together - end-to-end - in order to make a larger one. There is nothing particularly unusual about this product; it is basically a natural product and is widely used within the food industry - chances are that you've consumed food that uses it. You can learn more about this product here: http://www.cookingissues.com/primers/transglutaminase-aka-meat-glue/ Interesting stuff, but I have never used it in any project before, until now. It was definitely a fun and unique learning experience; plus, it allowed me to make a bresaola that was twice as big! This experiment was made possible by a man I am proud to call a friend: RichTee, of Mad Hunky Meats: Not long ago, Rich sent some meat glue for me to "play with," adding a note of encouragement:
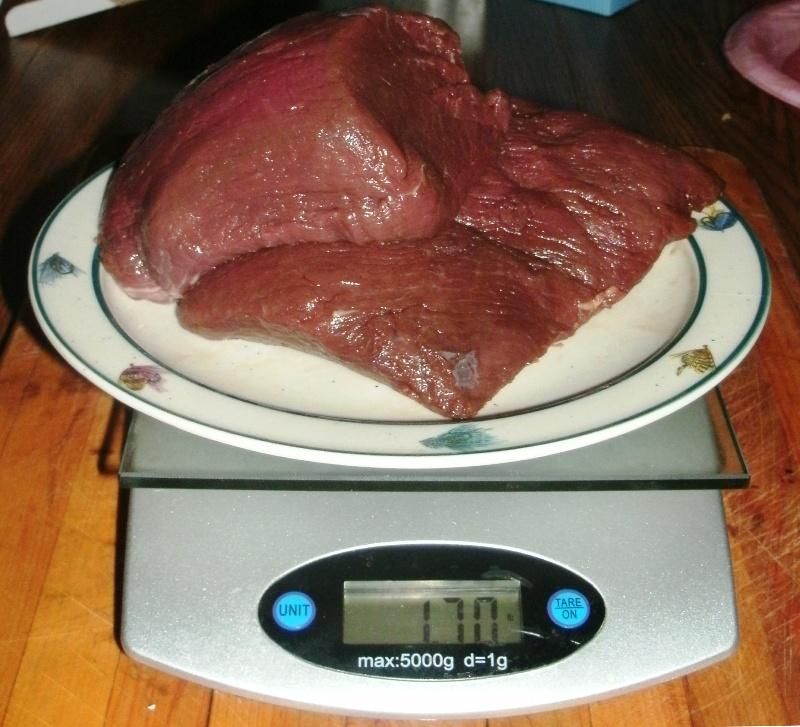
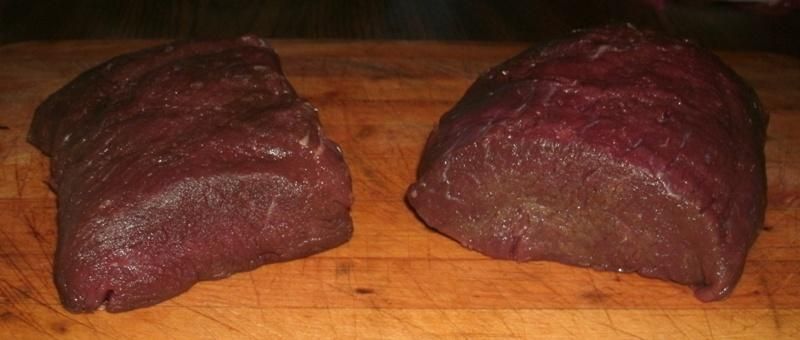
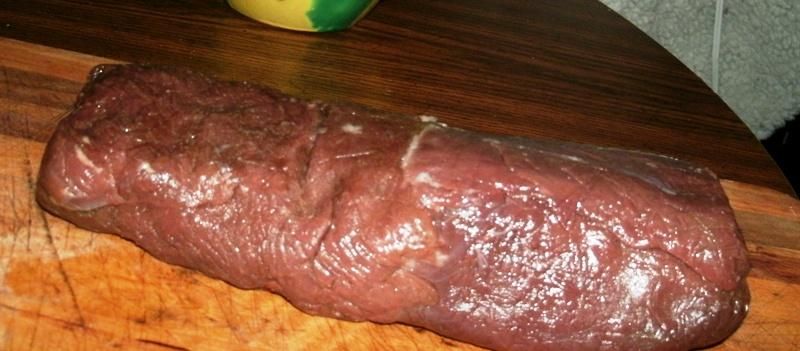
Ready to have some fun, I thawed and weighed two venison roasts; their combined weight was 1.7 pounds, or 771.1 grams:
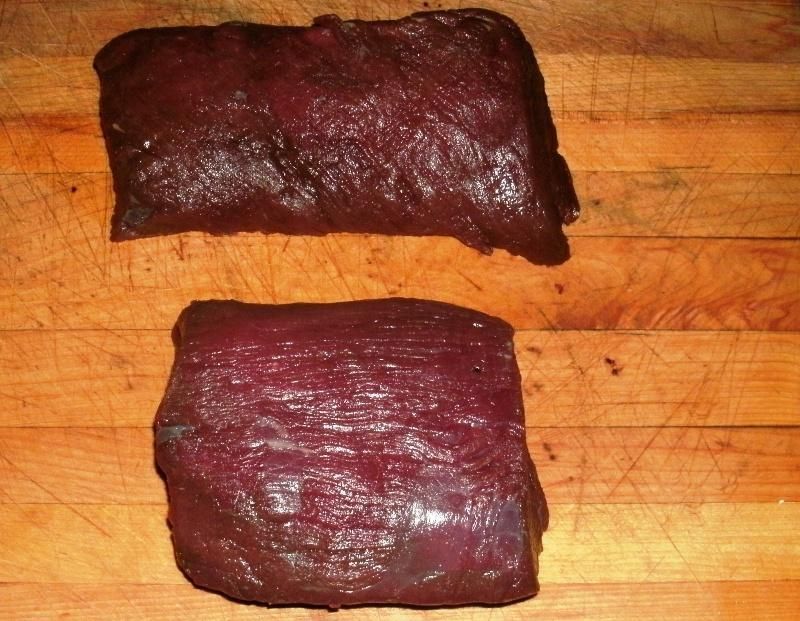
As you can see, the roasts were pretty different in shape:
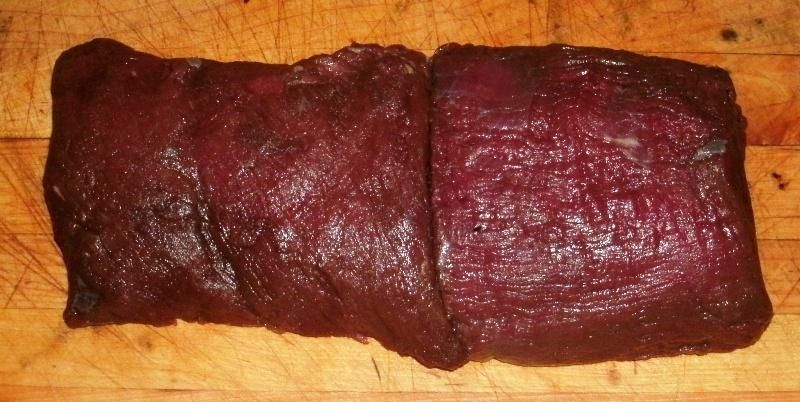
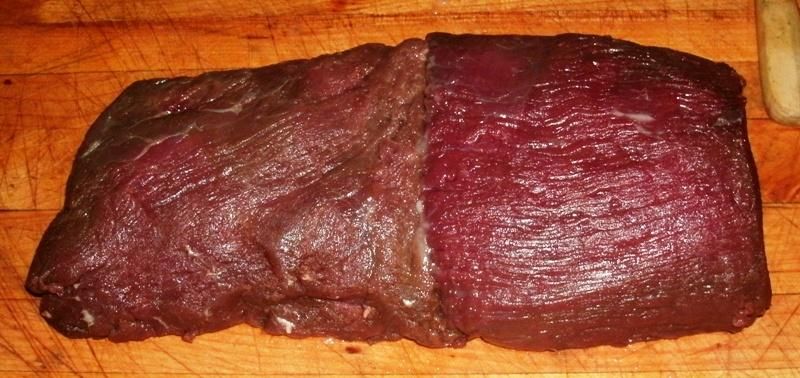
But I was able to find two ends that lined up fairly well, creating one large roast that kind of tapered a bit from one end to the other:
The grains didn't quite match, but the final product would not suffer, since slicing would basically be across the grain either way:
Next, I consulted these instructions:
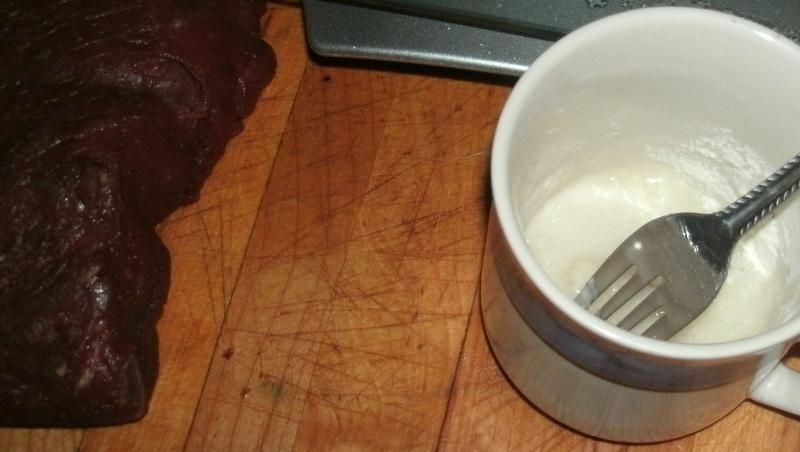
Following the guidelines, I "guesstimated" the amount of powdered meat glue I would need and mixed 3 grams of it with 12 grams of water:
I then "painted" the resulting slurry onto both surfaces of meat that were to be bonded, making sure that they were well-trimmed and free of membrane, silverskin etc.:
And then I pressed the two roasts together:
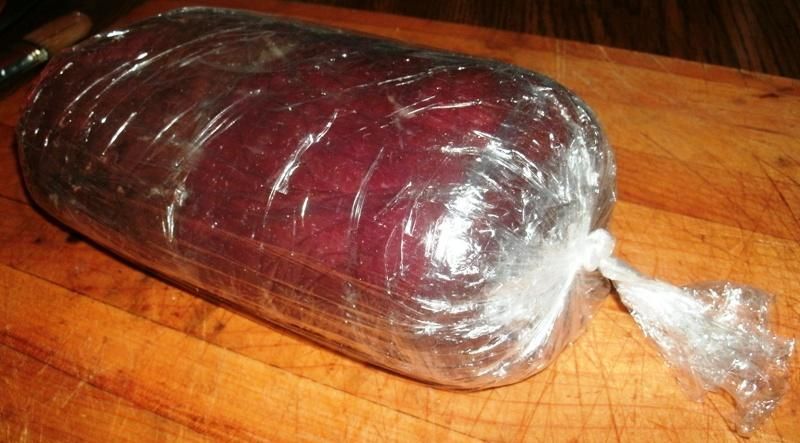
Looks like a pretty good fit to me! Next, I tightly triple-wrapped the combined roasts in saran wrap, twisting the ends to press the roasts together:
I then placed the "FrankenRoast" in the refrigerator, where it remained for 24 hours while the bond set and became permanent. The next day, I set about choosing a bresaola recipe and settled on this as my primary guide: http://mattikaarts.com/blog/charcuterie/bresaola/ I needed to make a couple of changes to this recipe, converting the measurements into amounts that were appropriate for the weight of the combined roasts; also, I decided to use TenderQuick (TQ) as a curing agent, which necessitated some math work. More on this later, but for now, let's look back to our meat-gluing project. After 24 hours had passed, I had a chance to evaluate the "meat glue," and was suitably impressed:
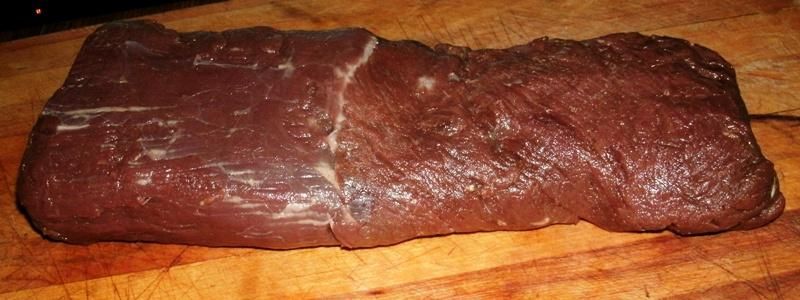
The seam was visible, but held together almost perfectly, with one ragged spot on one side where I don't think I applied enough of the Activa/water slurry. This wasn't much of a problem, since these things tend to correct themselves during the air-drying/curing stage. What really impressed me was that the two conjoined cuts of meat looked and acted just like one single cut, with no visible indication that they were bonded, other than the slight seam and the fact that the grains were just slightly out of sync. When viewed in silhouette, there was absolutely no indication that they were two separate pieces of meat:
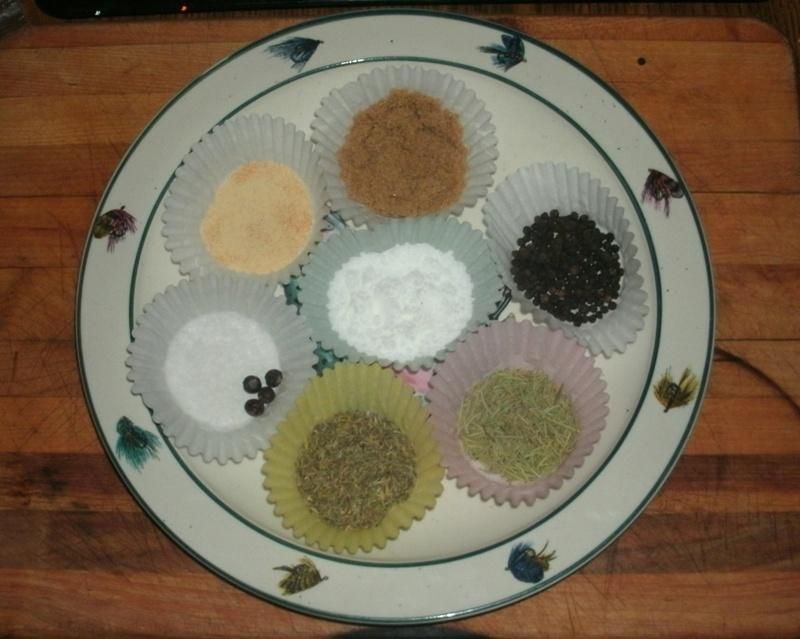
With success in that area, I got down to the business of making bresaola. Since my "source recipe" used a cut of meat that was 1300 grams, and mine was 771 grams, I had to do some "fuzzy math" in order to convert the measurements. I use the term "fuzzy math" because part of it is an exact science, while another part of it, to me, is instinctual, and nothing is set in stone. For instance, the amount for the cure needs to be as exact as can be and specific to the exact weight of the meat being used; on top of this, I was using a different type of cure (TenderQuick, versus the Cure #2 originally used). This is not a problem at all, and it is very easy to navigate the situation, as long as one matches the correct amount of the specific curing used to the weight of the meat. TQ is applied at the rate of 1 tablespoon per pound for whole cuts of meat; since this roast was just less than 1.67 pounds, I employed 1 tablespoon plus 2 teaspoons of cure. Also, since TQ already contains salt, I did not add any salt, as specified in the recipe, when I put my spice mix together. Regarding the other flavours, this is where the "instinct" comes into play. My venison roast is just under 2/3 the size of the one used in the source recipe, so I reduced the source measurements by roughly 1/3; however I did this on the "generous" side, rather than striving to be exact. The reason for this comes from lessons learned during my Romanian pastramă project; I found that the herbs and spices used while curing meat can end up having very subtle effect, and there is a risk of them getting lost in the process. Venison can handle bold flavours, so I tweaked most of the measurements on the generous side of the scale. Also, I added garlic to the party, since it seems to me that you can never go wrong with the combination of meat and garlic. I was dismayed to find that we didn't have any fresh garlic in the house, so I had to resort to granulated garlic, but I do not feel that this will be a problem. Here's how the measurements went down; I can't claim that the conversion was perfect, but I was very confident that it would work out quite well:
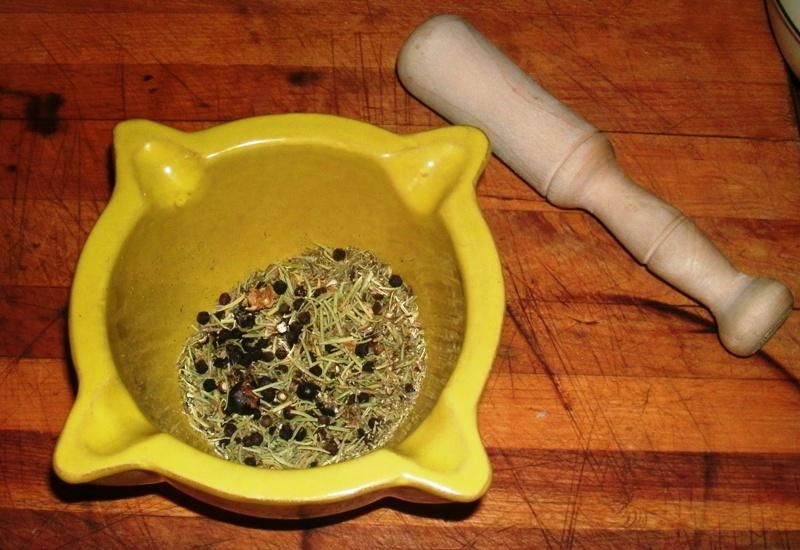
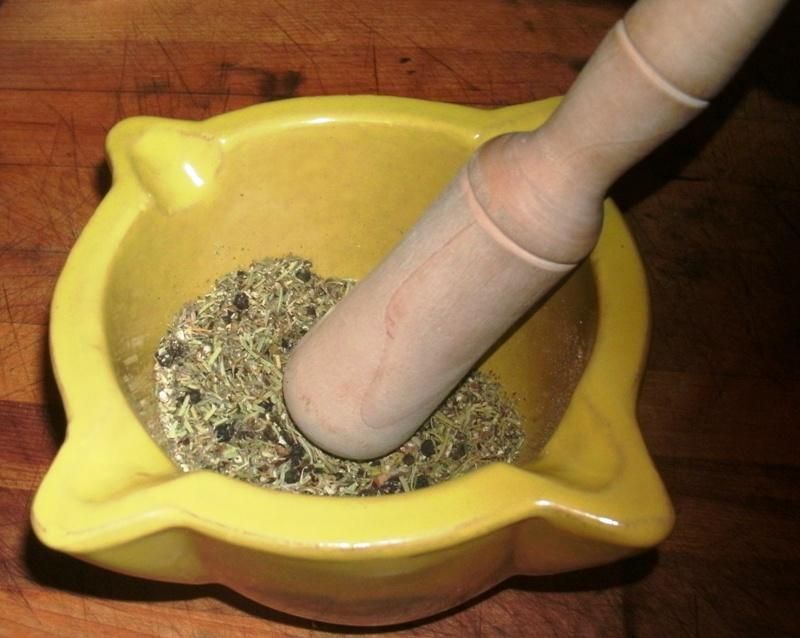
Ingredient Original Amount My Amount Meat 1300g (beef) 771g (venison) Some of you are already saying, "But dried herbs should be used in an amount that is half of what fresh herbs would be!" Normally, I would agree, but per my pastramă experience cited above, I chose to err on the side of bold flavour, rather than missing flavour. Anyway, I combined the TQ, brown sugar and granulated garlic in a bowl, and then turned my attention to the remaining herbs and spices. I suppose a food processor would have done the job very well, but where is the fun in that? Instead, the whole black peppercorns, rosemary and thyme leaves and whole juniper berries all went into my new mortar and pestle from La Tienda:
http://www.tienda.com/table/products/ca-15.html Next, I worked them over fairly well:
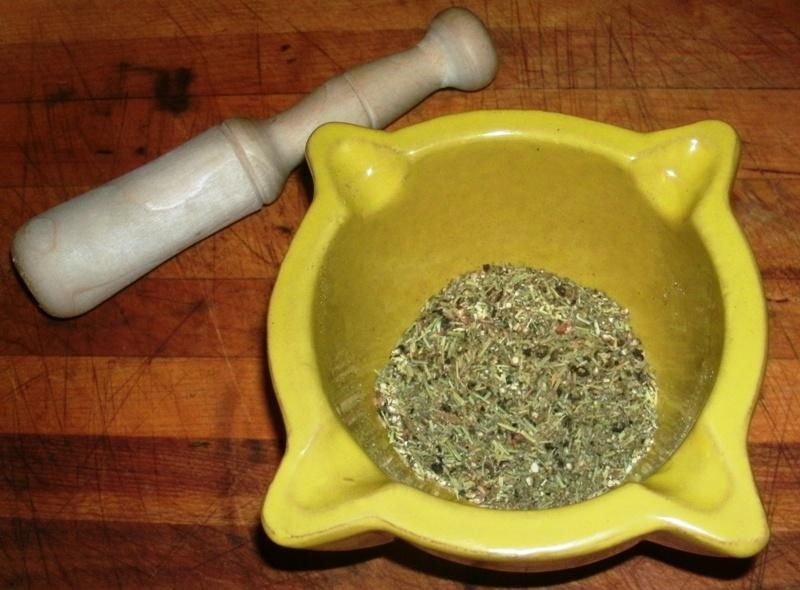
I continued grinding, crushing and pulverising until almost everything was a fine, almost powder-like texture, with a few pieces that were a little larger, for good measure:
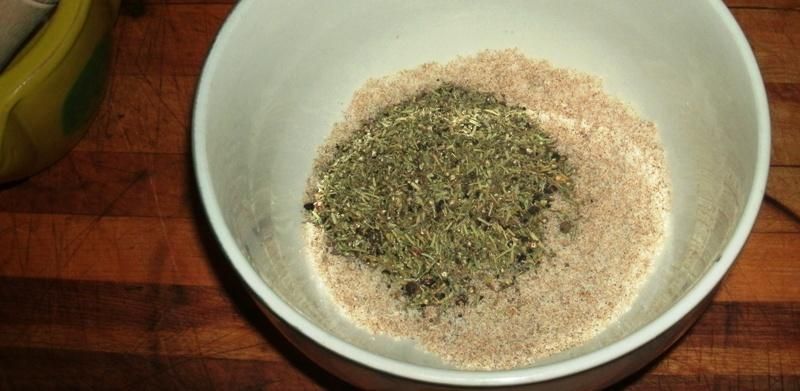
I could have kept grinding until everything was powder, but it always seems to me that a few coarser pieces have their roles to play, as well. I cannot fully describe that incredible aroma that these herbs and spices released as they were being processed by hand. I really must say that this is one amazing aromatic profile; the combination of pulverised rosemary and thyme, freshly-ground black pepper and freshly-ground juniper berries is really something nice! It is fresh and "clean," for lack of a better word, and in my opinion is perfectly suited for venison. I was very eager to see how the final product would turn out, but bresaola is a long process, so I held my patience. One thing is for sure: I believe that this profile is definitely worthy of further exploration. I added the freshly-ground herbs and spices to the TQ, brown sugar and garlic:
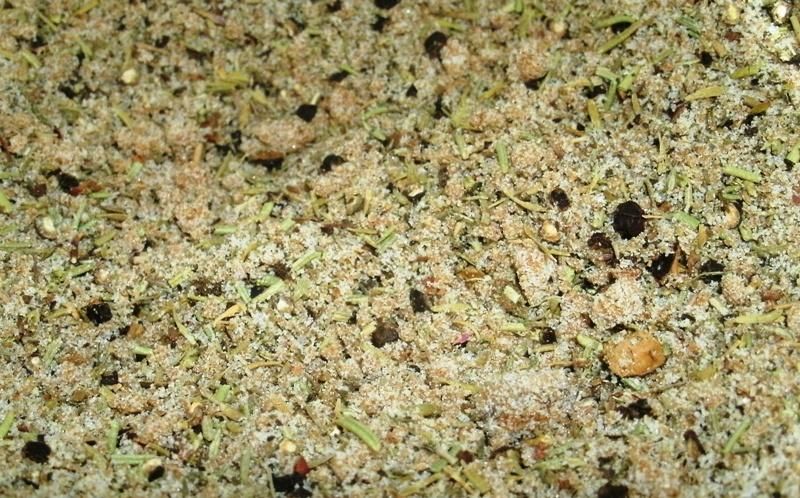
I then mixed them together thoroughly to form a wonderful dry brine:
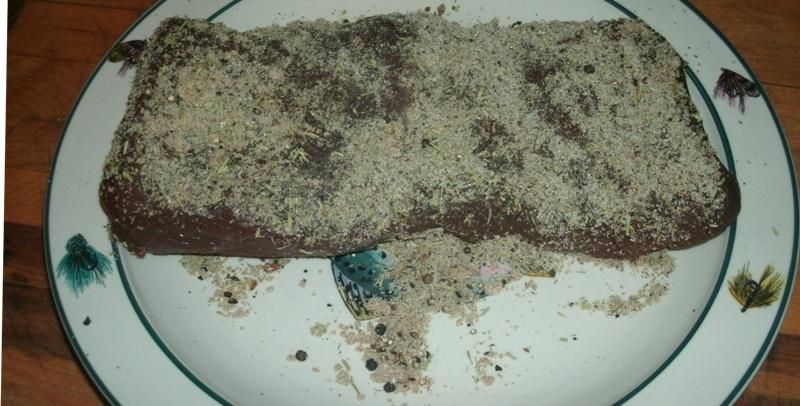
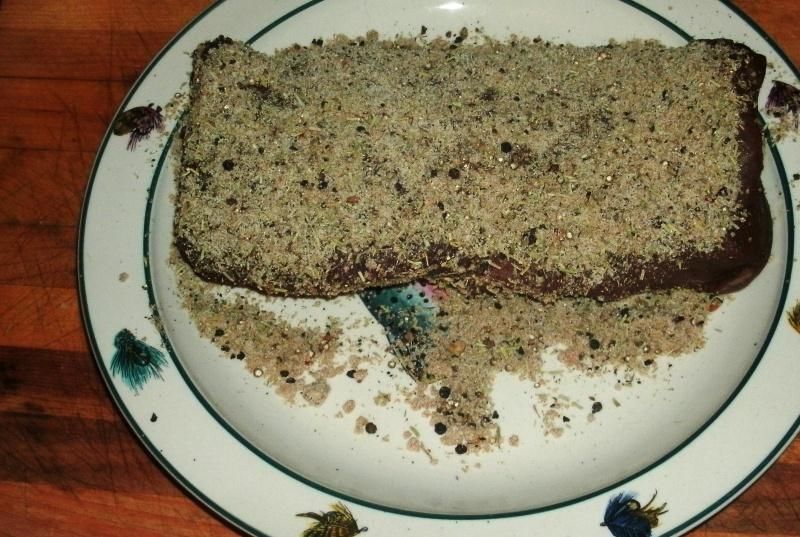
I coated one side of the venison roast with the brine:
Then the other:
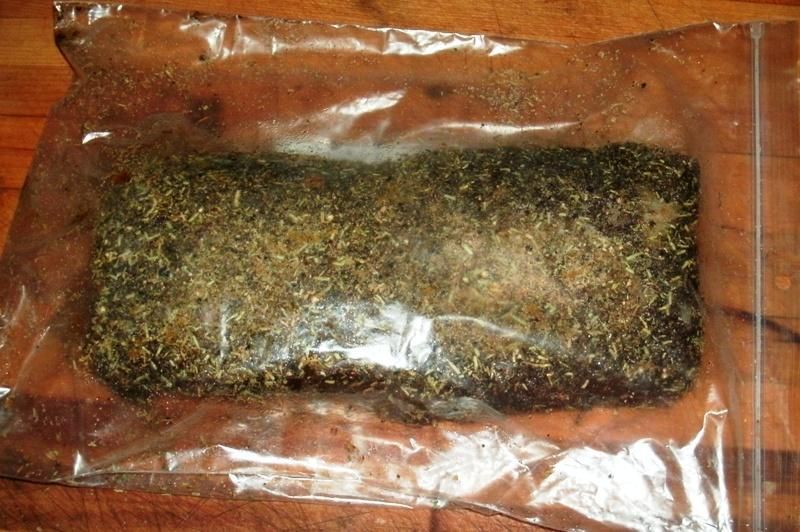
I then placed the coated roast in a large, ziplock-style bag, making sure to add any brine mix that had fallen off, so that I had all of the cure. I carefully pressed as much air out of the bag as I could and sealed it:
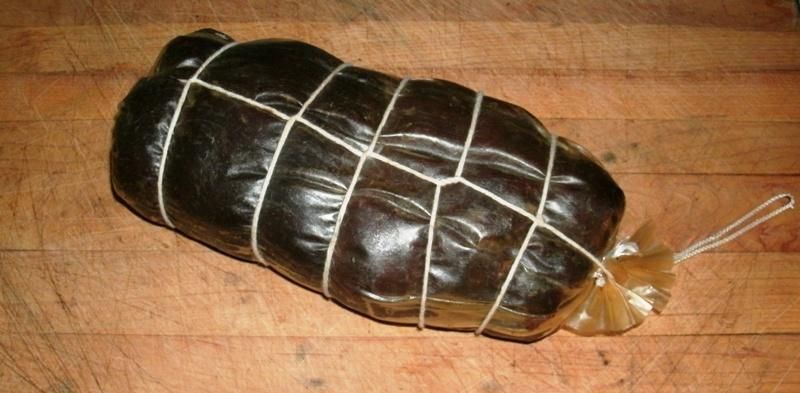
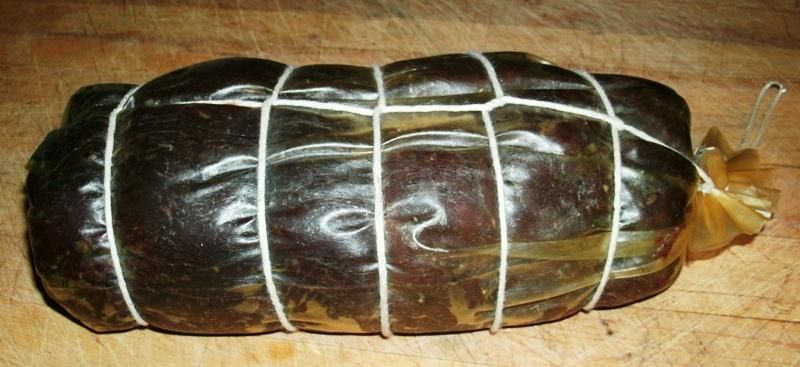
After that, I calculated the curing time and marked the bag with the product, the date the cure began and the date that it ended. Then, it went into the refrigerator, where it was turned and gently massaged once per day during the duration of the curing period. Regarding the curing time, TenderQuick does a very good job when used as part of a "dry brine" to cure whole cuts of meat in one stage up to 3 inches thick. The rate of cure for TenderQuick, according to their instructions, is 5 days per inch of thickness of the meat. Since the thickest part of the roast was just less than 2.5 inches, I rounded up to that thickness to be on the safe side and computed my time from there. With that in mind, and following the formula above, I concluded that 2.5 inches of thickness x 5 days = 12.5 days of minimum curing time. Since I began curing on the evening of December 6th, the curing was complete on the evening of December 19th - however, since the 19th was a Wednesday, and I can't ever get anything done during the week, I simply extended the curing time to the end of the week. Remember, you cannot overcure meat, so there's no problem extending a few days; the problems start if or when you undercure your meat. A note on curing: as you can see from following the "source recipe" link above, the instructions call for mixing the cure and spices, then dividing that mix (and the cure) in half. It then calls for curing a few days with half of the mix (and half the cure), then draining, then applying the other half of the mix (with the other half of the cure) for a few more days. the reason for this two-stage process is better distribute the cure throughout larger cuts of meat; it makes perfect sense for thick cuts of meat that are more than 3 inches thick, but since mine was much smaller, I simply cured my venison roast in one stage, with no problems. During the curing, I rotated the bresaola daily, massaging periodically in order to work the cure into the meat and help in the formation of the bresaola. Through some happy accident, I caught a whiff now and then of the ongoing process, and it sure smelled good, with an herb-filled aroma that had me eager to see how things would turn out with this. Once the curing was complete, I proceeded to the stage of preparation where I air-dried/cured the bresaola. First, I removed the bresaola from the bag and gently rinsed it off. I then soaked it for an hour in cold water so as to remove any excess salt. Encasing a bresaola during the air-curing stage is a good idea in order to ensure a quality product; it helps in regulating the drying process, which is useful in preventing "case hardening," where the outside of the meat dries out too quickly, making its own "case" of hard, dry meat, which keeps the inside from expelling excess moisture as it should. Traditionally, this is done in a natural beef "bung" casing; I really wanted to order a beef bung for this, and the cost for a single casing (4$) was quite affordable, but the shipping charges for that single casing (7.50$) made a 20-pack of collagen casings (16.99$ with free shipping) seem a lot more reasonable and practical. Per Dave's suggestion in his outstanding sausage tutorial:  While the bresaola soaked out the excess salt, I prepared the collagen casing by soaking it in warm water until it was quite pliable, then rinsed it off. I then slipped the bresaola into the casing and tied it closed, as close to the "top" of the meat as possible. Finally, I measured off a long length of kitchen twine and trussed up the whole package in order to hold it together and make it easy to hang:
It was here that I may or may not have made a mistake; concerned about air pockets in the casing, I decided to poke a dozen or so very small hole at various points in the casing. My logic was that as the casing dried, it would "shrink-to-fit" itself to the roast:
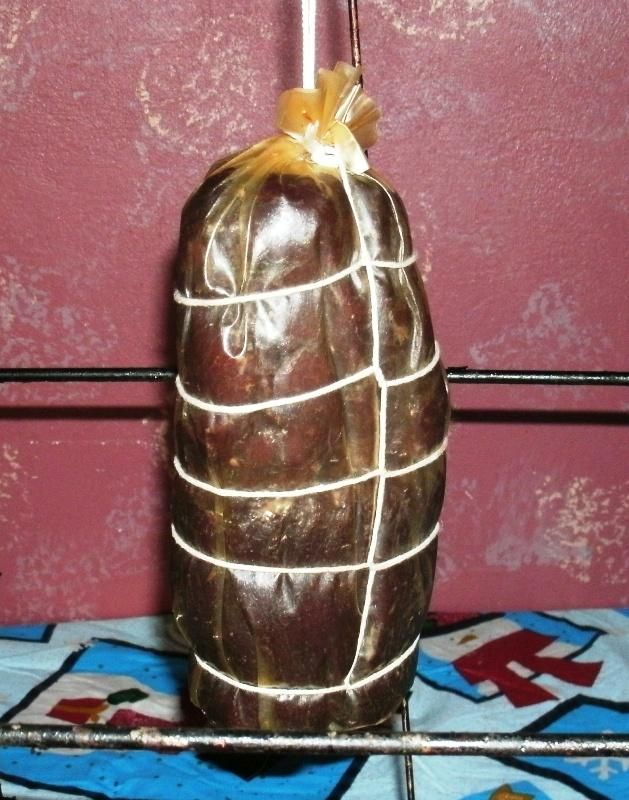
I don't know if it was necessary or not to do this, but it might have accelerated the drying process too much; more on that later. In any case, I then hanged (hung?) the bresaola from the top of the rack of my Little Chief smoker so that it could dry a bit in preparation for smoking:
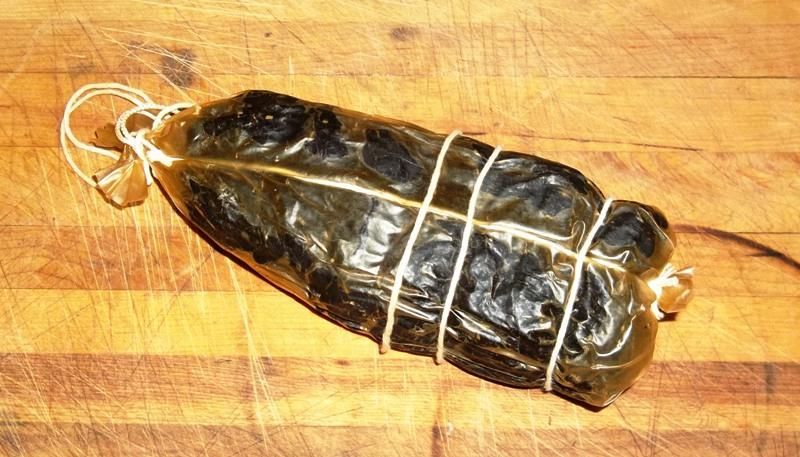
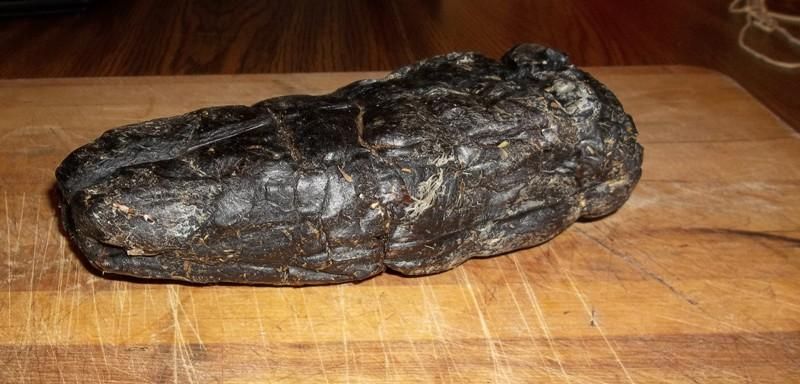
My plan was to give it a long, slow cold smoke over the course of several hours; since we were in the depths of winter, this was easy to do, since my Little Chief burns very, very slowly when the temperatures are that low. I chose a blend of alder and cherry wood for the smoke, as it goes very well with venison and cherry wood would be found in Italy. My goal was to keep the smoke subtle, but at the same time let it get in deep. Due to the colder temperatures, a pan of chips that normally takes 45 minutes to an hour to burn was instead taking several hours, so I believe I did a good job of getting a nice, deep smoke in there that isn't "too much." I applied the smoke a few hours at a time over the course of a week, hanging the bresaola from the ceiling of our closed-off front porch (sub-freezing this time of year) in the meantime. After a week of this subtle smoking, I left the bresaola hanging in the front porch for 3 weeks longer while it went through a process of dry-curing. When making my venison pastramă from Romania, most accounts only mentioned a hanging/aging time of a few days (3 to 7); my understanding was that bresaola hangs for a much longer time, but given the size of the cut and the type of meat (venison), I surmised that I wouldn't be hanging it much longer than a few weeks - maybe a month, tops. I'm sure I could have gone longer; but all things considered, I would think that there would be some diminishing returns somewhere. Larger, thicker beef bresaoli dry-cure for a moth at minimum, usually a lot longer, but venison is different, and given the size of my roast, I figured I was on fairly solid ground. Usually, bresaola is protected from pathogens and "bad" mold during this drying period by a thin layer of white, "friendly" mold that grows on the outer case; it is possible to buy this mold commercially and apply it, but between the curing, the smoke, the extremely low humidity of my geographic location and the very low temperatures during December and January, which hovered right around and/or below freezing on the front porch the entire time, this did not seem at all necessary, which is a good thing, since I had none of this mold culture on hand. Alternately, I toyed with the idea of giving the bresaola an occasional wipe-down with red wine; I figured this would accomplish three things: first, it would protect the bresaola from any pathogens that might be tempted to grow even in spite of all the harsh conditions; also, it would help to ensure that the bresaola wouldn't dry out too quickly on the outside and develop the aforementioned case hardening. Finally, I figured that some good and interesting flavours might be imparted by the process. I checked the bresaola periodically as the meat slowly gave up its excess moisture. There definitely was some shrinkage, and the "ends" of the bresaola grew decidedly firmer. Also, there was absolutely no hint of any mold, good or bad, so in the end, I decided not to bother with any wine wipe-down; having said that, the next time I make a bresaola, I think I will try it, in order to compare results. When I figured it had dry-cured long enough, I brought the bresaola down and took a look at what I had wrought:
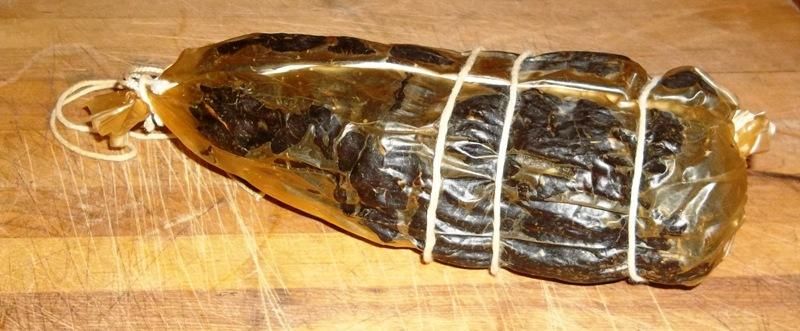
As you can see, it did shrink a bit, enough so that the kitchen twine slipped in a few places; also, it had grown quite firm and dry:
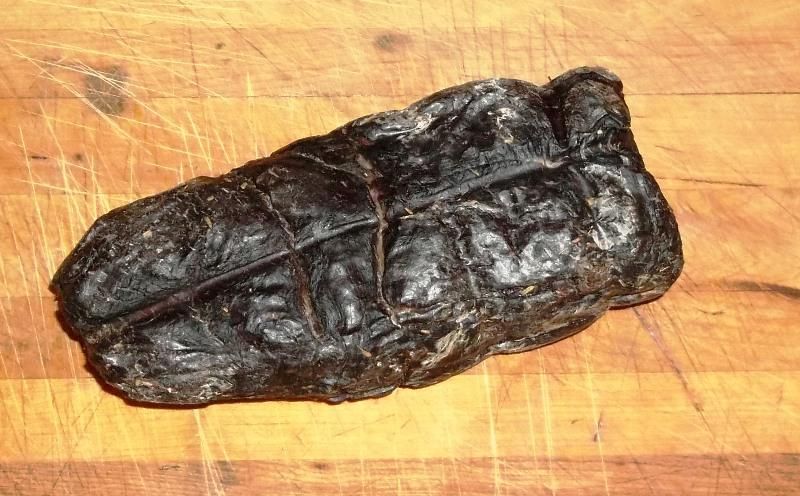
Unsure of what to expect, I un-wrapped the casing to reveal this:
The dark, dry surface is fairly normal, and there was evidence of some case hardening, but it didn't look too bad, especially for a first attempt in an environment that had absolutely no artificial controls; besides, I knew from previous experience with my pastramă project that this ugly-looking lump of dried exterior most likely contained some very lovely and delicious treasures inside:
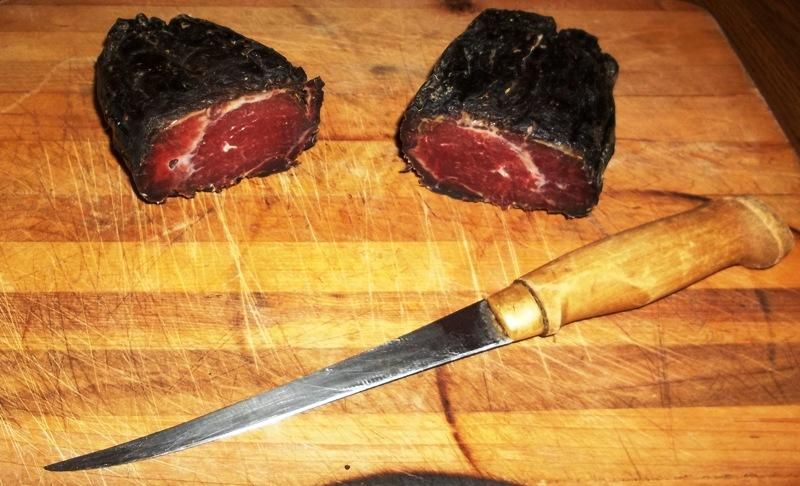
Interestingly, there was very little, if any, hint that these are in fact two separate roasts bonded together, and I declared my meat glue experiment a success. Eager to see how it turned out, I slashed the bresaola open with my fillet knife:
The cut was quite close to the seam created by the meat glue, so there was some interesting texture there; but as you can see, the bresaola turned out pretty well, at least in my opinion. You can see here that the case hardening did penetrate a little deeper than I had hoped:
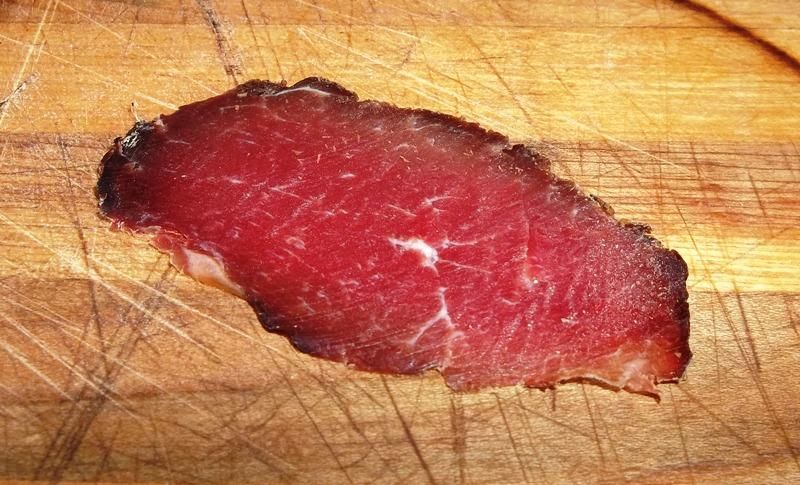
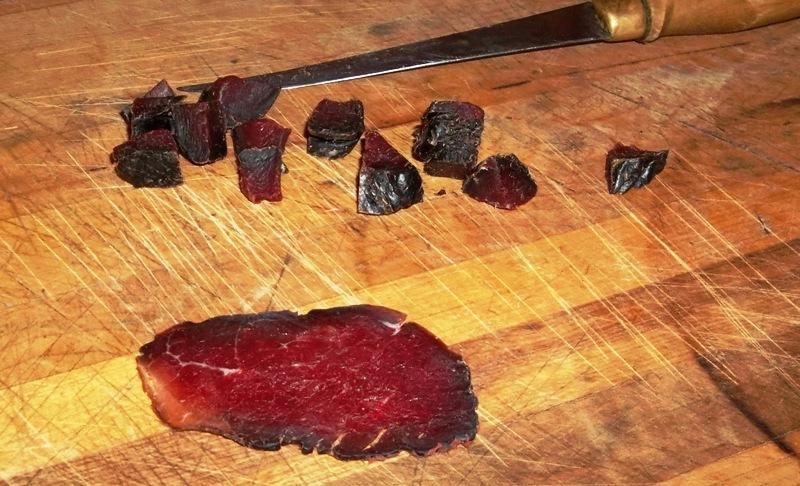
Because of this, I will definitely not bother with poking any holes in the case next time for shrink-fitting; also, I will indeed try to slow the drying with a daily red-wine wipe-down, and see what kind of results I get. The bresaola looked fine to me; the colour was actually a little darker and deeper than indicated here, where the flash takes over a little bit. It smelled incredible, full of fresh, clean, spicy-herby goodness; and while I could pick out each and every component of the spice mixture, none took over or dominated - they all worked together very well. I set up my slicer and proceeded to see how thin I could shave the bresaola; I think I did pretty well, and sampled this piece:
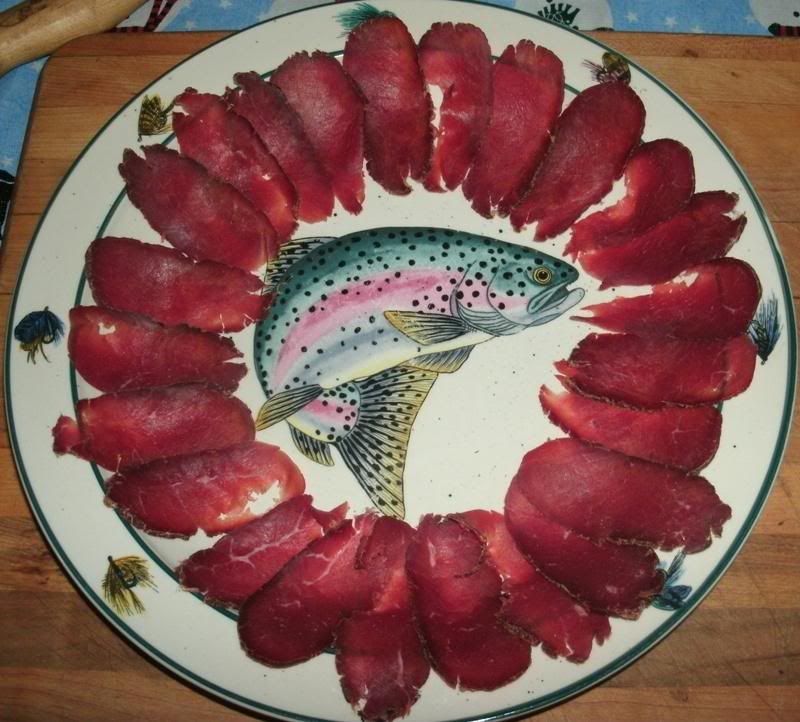
The taste was very good, tangy with the aging process and reminiscent of all the flavours I had massaged into the venison. I have never had "true" bresaola before, so I could be wrong, but the texture seemed just a small bit too "raw," making the product slightly softer or "gummier" than I expected, but once again, considering that this is not fully cooked, this could be entirely normal for bresaola - I've never had it, and would appreciate some impressions from those with experience on what the texture should be like. No matter, it tasted great, and I knew I would be making another one of these. I continued slicing, as thin as possible:
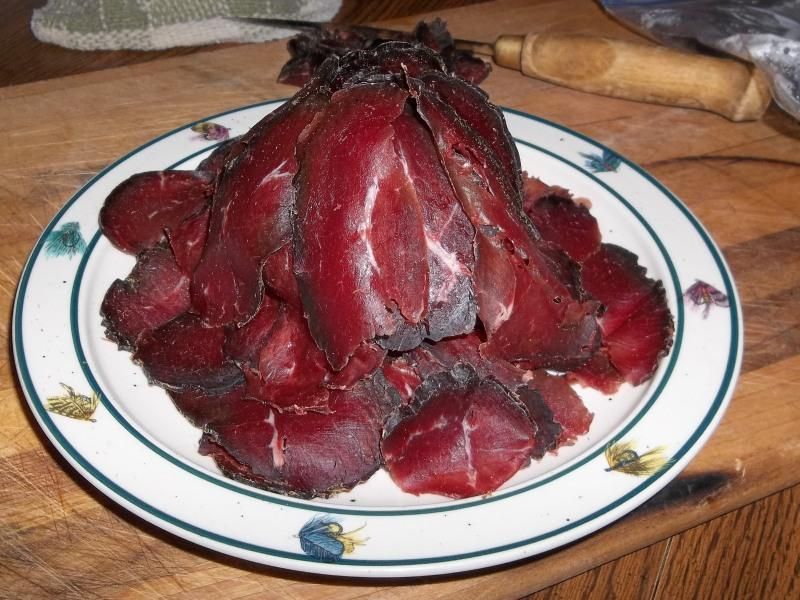
And eventually, I amassed quite a pile of the stuff:
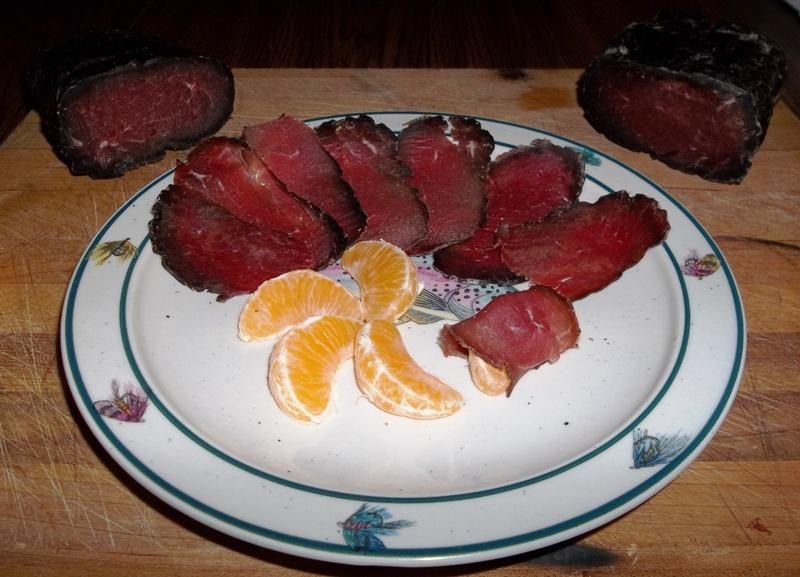
It's funny, because people pay a LOT of money for these products, when it is so easy to make your own - literally for pennies - and have it be just as good, or better! I finished slicing it all, then vacuum-packed most of it into two packages and put it in the freezer. I held some back, and arranged it on a small platter with some small orange segments for wrapping:
These little bites were pretty good, with a citrus highlight to the rosemary, garlic and other flavours - an easy, simple and delicious treat. But that's not all - during the course of my slicing, I ended up with quite a few small, hard, bresaola cubes that I cut since the ends were too hard to slice:
I simmered a bunch of these cubes from both ends in just a little bit of water, to soften them up, then sautéed them just a bit and served them in rice as a side dish for that evening's meal - delicious! The flavour was beyond bacon, beyond ham - with full Italian goodness that made a nice diversion from the norm. All-in-all, I think I did pretty well with this project. As I said, it probably wasn't perfect, but this was a first attempt, and we learn as we go. The main thing is that we can't learn if we don't try, so I encourage anyone and everyone who is interested to try this or some other charcuterie project that they may have been considering. It's easy, it's delicious, and it really is hard to fail - even when your product doesn't come out quite "right," according to some book, it is most often still delicious! Thanks for taking the time to read this, and as always, if there are any questions, please do ask. For anyone who is more experienced at this, I'd appreciate any advice you might offer in order to help me learn to improve the product. It was great, but I've learned that almost anything can almost always be better! |
||
|
If you are a visitor and like what you see, please click here and join the discussions in our community!
|
||
 |
||
| Sponsored Links | ||
|
||
|
Hoser
Admin Group

Joined: 06 February 2010 Location: Cumberland, RI Status: Offline Points: 3454 |
Post Options
Thanks(0)
Quote Reply
Posted: 01 March 2013 at 03:49 |
|
|
Phenomenal job with that venison Ron!
God, how I wish I had the room to make a curing chamber out of an old fridge...I'd be all over the dry-curing gig in no time. Well you've got me drooling anyway Ron.
 |
||
|
Go ahead...play with your food!
|
||
|
||
|
TasunkaWitko
Admin Group
Joined: 25 January 2010 Location: Chinook, MT Status: Offline Points: 9389 |
Post Options
Thanks(0)
Quote Reply
Posted: 01 March 2013 at 08:42 |
|
|
Good morning, Dave, and thank you!
This one was a real joy - I learned quite a few things, and I turned out some pretty darn good charcuterie. What continues to amaze me is how easy these projects can be, and how accessable they are. With a little bit of research and a willingness to step out of the comfort zone, a person can find themselves enjoying some really good products that they would otherwise have to pay quite a bit for.
curing chamber out of an old fridge.....this is one area where I consider myself lucky; in my dry, cool (in the winter) climate, these sort of things can be managed. In the case of this project, a little mositure is what was actually needed, to prevent the extent of the case hardening.
I don't know what your climate is like this time of year, Dave, but if it's still relatively cool with good airflow, I don't see any reason why you couldn't give it a go, chamber or no chamber. The product might need a little extra attention and TLC, compared to having a chamber, but I'm willing to bet that it can be managed. Perhaps we can talk to Rich and some of the experts and do a little brainstorming for alternatives.
|
||
|
If you are a visitor and like what you see, please click here and join the discussions in our community!
|
||
|
||
|
gonefishin
Master Chef

Joined: 20 September 2012 Status: Offline Points: 1778 |
Post Options
Thanks(0)
Quote Reply
Posted: 01 March 2013 at 09:04 |
|
|
Oh my word! You guys/gals never cease to amaze me. Tas, you have some real skill there...unbelievable!
great job! |
||
|
Enjoy The Food!
|
||
|
||
|
TasunkaWitko
Admin Group
Joined: 25 January 2010 Location: Chinook, MT Status: Offline Points: 9389 |
Post Options
Thanks(0)
Quote Reply
Posted: 01 March 2013 at 09:39 |
|
|
Hi, Dan -
Thanks for the kind words ~ I'm waiting to see you give something like this a try, because I am sure that you could rock it!
|
||
|
If you are a visitor and like what you see, please click here and join the discussions in our community!
|
||
|
||
|
Margi Cintrano
Master Chef

Joined: 03 February 2012 Location: Spain Status: Offline Points: 6362 |
Post Options
Thanks(0)
Quote Reply
Posted: 01 March 2013 at 10:41 |
|
|
Tas,

Magnificant job with this gorgeous venison bresaola ... I would love to be your taste tester !
 Truly marvelous looking product to start with ... the key !
I also like the citrus idea served to cleanse palate ... or fresh berries are nice too with venison.
Kindest.
Margi.
|
||
|
Volamos a Mediterraneo, un paraiso que conquista su gente u su cocina.
|
||
|
||
|
TasunkaWitko
Admin Group
Joined: 25 January 2010 Location: Chinook, MT Status: Offline Points: 9389 |
Post Options
Thanks(0)
Quote Reply
Posted: 01 March 2013 at 11:14 |
|
|
Hi, Margi, and thanks ~ this definitely turned out well; but even so, I know I can improve it a bit next time.
It's really fascinating - to me - to take a lump of raw meat and transform it into something sonderful, adding some spice here, some herbs there - a little smoke, and of course some sort of curing agent, even if it is just salt, as so many European products use. I am finding that these products all have remarkable similarity and the only real differences are ingredients and flavour profiles based on regional availability and preference. Sometimes the methods are slightly different, but the fundamental core of nearly all of these products is fairly universal, which makes sense, since mankind has been engaging in this form of preservation since the most ancient of times.
|
||
|
If you are a visitor and like what you see, please click here and join the discussions in our community!
|
||
|
||
|
MarkR
Chef 

Joined: 03 February 2011 Location: St. Pete FL Status: Offline Points: 625 |
Post Options
Thanks(0)
Quote Reply
Posted: 01 March 2013 at 11:48 |
|
|
Bravco Ron, nice work! That is on my short list after I finish the Sopressata. The curing chamber is kinda full right now. Looks great!!!
|
||
|
Mark R
|
||
|
||
|
TasunkaWitko
Admin Group
Joined: 25 January 2010 Location: Chinook, MT Status: Offline Points: 9389 |
Post Options
Thanks(0)
Quote Reply
Posted: 01 March 2013 at 11:52 |
|
|
Thanks, Mark - you're gonna love it and want to make it again, so be sure to document and post!
|
||
|
If you are a visitor and like what you see, please click here and join the discussions in our community!
|
||
|
||
|
Margi Cintrano
Master Chef
Joined: 03 February 2012 Location: Spain Status: Offline Points: 6362 |
Post Options
Thanks(0)
Quote Reply
Posted: 01 March 2013 at 11:56 |
|
|
Tas,
It truly is an art form ... And your penchant for air drying and smoking and curing meats from distinct parts of the old continent of Europe are amazing.
May I suggest one thing ?
The Carving Knife: to slice the gorgeous charcuterie much thinner ...
As in the Jabugo Iberian Acorn fed hams ...
Great job, and I would love to see your future work too ...
Kindest. Margi.
|
||
|
Volamos a Mediterraneo, un paraiso que conquista su gente u su cocina.
|
||
|
||
|
MarkR
Chef
Joined: 03 February 2011 Location: St. Pete FL Status: Offline Points: 625 |
Post Options
Thanks(0)
Quote Reply
Posted: 01 March 2013 at 13:05 |
|
|
Ya know, since Margi mentioned the knife, I used to have one like that...when I was a kid!

|
||
|
Mark R
|
||
|
||
|
Margi Cintrano
Master Chef
Joined: 03 February 2012 Location: Spain Status: Offline Points: 6362 |
Post Options
Thanks(0)
Quote Reply
Posted: 01 March 2013 at 13:47 |
|
|
Mark;
To digress for a moment; look in Iberia Section at the Iberian acorn fed Ham; and notice how thin, we here across the Atlantic Pond, carve our Charcuterie ... There are culinary courses here for how to slice Iberians hams ...
They are like Ron´s; long knife, very thin, SHARP SHARP blades; and the meat is sliced or carved length-wise --- not horizontally; so one obtains a very thin slice of the charcuterie meat ... It is as thin as a piece of tracing paper !!! Melts in one´s mouth ...
It is considered an art here ...
Try to watch re-runs of Chef José Andrés TV Show, MADE IN SPAIN ... Notice the photos of the thinly sliced bresaola in the fotos; prior to Ron´s pictorial.
I truly think Ron has done an amazing job; it is just I would prefer the slices to be a bit thinner ...
Kindest. Margi.
|
||
|
Volamos a Mediterraneo, un paraiso que conquista su gente u su cocina.
|
||
|
||
|
MarkR
Chef
Joined: 03 February 2011 Location: St. Pete FL Status: Offline Points: 625 |
Post Options
Thanks(0)
Quote Reply
Posted: 01 March 2013 at 14:17 |
|
|
Yes, thinner is better.
|
||
|
Mark R
|
||
|
||
|
TasunkaWitko
Admin Group
Joined: 25 January 2010 Location: Chinook, MT Status: Offline Points: 9389 |
Post Options
Thanks(0)
Quote Reply
Posted: 01 March 2013 at 14:28 |
|
|
Thinner is always better indeed - paper-thin when possible. I learned that quite a while ago when I did my chipped beef and pastramă projects:
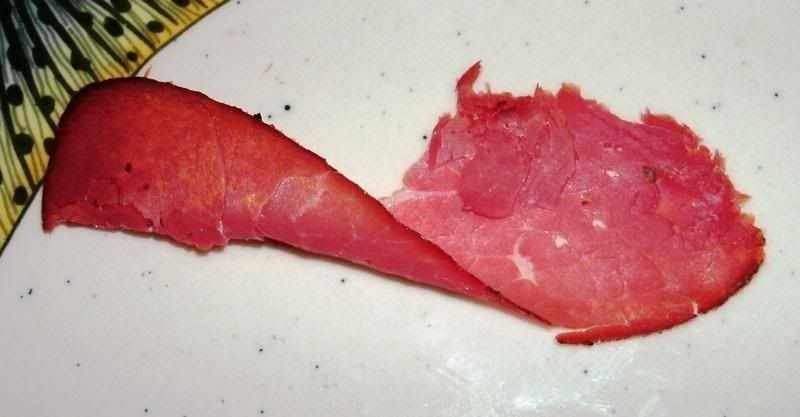 On some of these, you can actually see the plate through the slices:
 With this bresaola project, the case hardening on the outside of the roasts made for some difficult cutting; also, the darker colour around the rim of the slice makes it look thicker than it actually is, but if you take a close look at these, especially the ones that are draped vertically, you can see that they're pretty dang thin:
 Looking at these three photos, I don't think I could have done any better by hand with any knife. It would be nice to get one of those carving knives for jamon iberico, but financially it is simply not possible to get one of any quality that would do better than I already have here.
|
||
|
If you are a visitor and like what you see, please click here and join the discussions in our community!
|
||
|
||
|
Margi Cintrano
Master Chef
Joined: 03 February 2012 Location: Spain Status: Offline Points: 6362 |
Post Options
Thanks(0)
Quote Reply
Posted: 01 March 2013 at 14:49 |
|
|
Tas,
Firstly, you have done a magnificant job on your Bresaola ...
It was only a future suggestion ... It would certainly be a worthwhile investment considering your penchant for charcuterie making ... However, perhaps a 2nd hand one, or a better knife than you are utilizing ...
You are veered toward preparing charcuterie, and certainly are qutie an artist in home in this sector of gastronomy. It was only a suggestion to consider.
Kindest regards,
Margi.
|
||
|
Volamos a Mediterraneo, un paraiso que conquista su gente u su cocina.
|
||
|
||
|
TasunkaWitko
Admin Group
Joined: 25 January 2010 Location: Chinook, MT Status: Offline Points: 9389 |
Post Options
Thanks(0)
Quote Reply
Posted: 01 March 2013 at 14:52 |
|
|
I'd love to get one, certainly ~ one of these days, when I have a little extra money to spend!
|
||
|
If you are a visitor and like what you see, please click here and join the discussions in our community!
|
||
|
||
|
africanmeat
Chef

Joined: 20 January 2012 Location: south africa Status: Offline Points: 910 |
Post Options
Thanks(0)
Quote Reply
Posted: 02 March 2013 at 12:13 |
|
|
Ron it looks great another great project it reminds me of the bastrama(pastrma) project .
it looks the same color .  |
||
|
Ahron
|
||
|
||
|
TasunkaWitko
Admin Group
Joined: 25 January 2010 Location: Chinook, MT Status: Offline Points: 9389 |
Post Options
Thanks(0)
Quote Reply
Posted: 18 March 2013 at 13:24 |
|
|
Hi, Ahron -
Yes, this is very similar to the bastrama/pastrama - the spices and flavour profile is slightly different, but the basic procedure and end product are nearly identical ~ very good stuff, indeed!
|
||
|
If you are a visitor and like what you see, please click here and join the discussions in our community!
|
||
|
||
|
Margi Cintrano
Master Chef
Joined: 03 February 2012 Location: Spain Status: Offline Points: 6362 |
Post Options
Thanks(0)
Quote Reply
Posted: 14 August 2013 at 05:46 |
|
|
Tas.
Award winning Ham carver, who I interviewed in July, FLORENCIO SANCHIDRIÁN employs I. KNOX knives produced in Switzerland. It was one of his Interview Questions ... Thought I would post this for future reference for you. ALL MY BEST FOR WONDERFUL SUMMER, MARGAUX & PHIL.
|
||
|
Volamos a Mediterraneo, un paraiso que conquista su gente u su cocina.
|
||
|
||
|
TasunkaWitko
Admin Group
Joined: 25 January 2010 Location: Chinook, MT Status: Offline Points: 9389 |
Post Options
Thanks(0)
Quote Reply
Posted: 14 August 2013 at 08:50 |
|
|
Thanks for the information, Margi - I do have one Swiss knife, and I love it! If/when I get better at my charcuterie endeavours, it might be worth looking into one of these I. Knox knives!
|
||
|
If you are a visitor and like what you see, please click here and join the discussions in our community!
|
||
|
||
|
Post Reply
|
Page 12> |
 Tweet
Tweet
|
| Forum Jump | Forum Permissions You cannot post new topics in this forum You cannot reply to topics in this forum You cannot delete your posts in this forum You cannot edit your posts in this forum You cannot create polls in this forum You cannot vote in polls in this forum |


 Topic Options
 Bresaola or brisaola is air-dried, salted beef that has been aged two or three months until it becomes hard and turns a dark red, almost purple colour. It is made from [the] round, and is lean and tender, with a sweet, musty smell. It originated in Valtellina, a valley in the Alps of northern Italy's Lombardy region.