
|
Thank you, from the Foods of the World Forums! |
Khoubz Araby |
Post Reply 
|
| Author | ||
TasunkaWitko 
Admin Group 

Joined: 25 January 2010 Location: Chinook, MT Status: Offline Points: 9389 |
 Post Options Post Options
") Thanks(0) Thanks(0)
 Quote Reply Quote Reply
 Topic: Khoubz Araby Topic: Khoubz ArabyPosted: 29 January 2014 at 18:46 |
|
Khoubz Araby Arab Bread Wheat, acknowledged as mankind's oldest cultivated crop, was first domesticated at least 9,000 years ago from wild grasses found in this region; and the rest - as they say - is history. From these fertile valleys, golden, nutritious wheat - and other grains - nourished emerging civilisations and fed armies as glorious empires were forged. This, from Time-Life's Foods of the World - Middle Eastern Cooking, 1969: |
||
|
If you are a visitor and like what you see, please click here and join the discussions in our community!
|
||
 |
||
| Sponsored Links | ||
|
||
|
HistoricFoodie
Admin Group
Joined: 21 February 2012 Location: Kentucky Status: Offline Points: 4945 |
Post Options
Thanks(0)
Quote Reply
Posted: 29 January 2014 at 20:10 |
|
|
Ron,
Pocket breads such as this are dependent on rapid heating to form the balloons. What happens is that steam causes the sudden rising. To that end, the dough is usually cooked on a preheated surface. In your case, the sheet pans should have been heated in the oven, and the breads laid on them. That would have helped with the non-puffing issue. Flatbreads of this nature do not have to be done in the oven. A hot griddle, on the stovetop, serves just as well, and is more in line with how nomadic peoples would have "baked" their bread. Anyway, next time try preheating the pans, and see if that doesn't make a difference. |
||
|
||
|
AK1
Master Chef

Joined: 10 April 2012 Location: Ontario, Canada Status: Offline Points: 1081 |
Post Options
Thanks(0)
Quote Reply
Posted: 30 January 2014 at 21:41 |
|
|
I think I would try a different flour to get closer to "what might have been".
I'm thinking fine stone ground, whole grain, probably organic(don't know if that would make much difference; I'm not a big believer). It would be an interesting experiment to make the bread with different wheat flours, and compare.
|
||
|
||
|
TasunkaWitko
Admin Group
Joined: 25 January 2010 Location: Chinook, MT Status: Offline Points: 9389 |
Post Options
Thanks(0)
Quote Reply
Posted: 30 January 2014 at 21:59 |
|
|
Brook - I agree about the pre-heating of the baking sheets; I briefly considered baking them on my pizza stone, but opted not to in the end. Results may have been a lot different as far as the "puffing" goes, but I must stress again: it sure tasted good, no matter what!
Darko - I think you're onto something with the different flours. Brook and I were discussing this via PM, and he mentioned an Egyptian version, khoubz baladi, which employs essentially the same method with whole wheat flour. I can only imagine how good this would be, until I try it someday!
|
||
|
If you are a visitor and like what you see, please click here and join the discussions in our community!
|
||
|
||
|
HistoricFoodie
Admin Group
Joined: 21 February 2012 Location: Kentucky Status: Offline Points: 4945 |
Post Options
Thanks(0)
Quote Reply
Posted: 30 January 2014 at 22:44 |
|
|
I did the baladi with half whole wheat and half bread flour, and it was the best "pita" I'd ever tasted. Haven't gotten around to making them with all whole wheat, but it's on my to-do list.
Darko, while there are all sorts of reasons why organic can be a good thing, there should be no effect on the final product based on using organic or non-organically grown wheat. But I agree that using different flours can have an effect on the final bread. One of these days......
|
||
|
||
|
HistoricFoodie
Admin Group
Joined: 21 February 2012 Location: Kentucky Status: Offline Points: 4945 |
Post Options
Thanks(0)
Quote Reply
Posted: 31 January 2014 at 08:38 |
|
|
In our private discussions, Ron requested that I post Alford and Duguid’s recipe for baladi, just as a comparison. Here it is:
2 tsp active dry yeast 2 ½ cups luke warm water 5-6 cups hard whole wheat flour, or 3 cups each whole wheat flour and hard unbleached white flour or unbleached all-purpose flour 1 tbls salt 1 tbls olive oil In a large bread bowl. Sprinkle the yeast over the warm water. Stir to dissolve. Stir in 3 cups flour a cup at a time, and then stir 100 times, about 1 minute, in the same direction to activate the gluten. Let this sponge rest for at least 10 minutes, or as long as 2 hours. Sprinkle the salt over the sponge and stir in the olive oil. Mix well. Add more flour, a cup at a time until the dough is too stiff to stir. Turn it out onto a lightly floured surface and knead for 8 to 10 minutes, until smooth and elastic. Rinse out the bowl, dry, and lightly oil. Return the dough to the bowl and cover with plastic wrap. Let rise until at least doubled in size, approximately 1 ½ hours. (The dough can be made ahead to this point and stored, covered, in the refrigerator for up to 7 days). If baking the breads: Place unglazed quarry tiles or two small baking sheets on the bottom rack of your oven, leaving a 1-inch gap all around between the tiles or sheets and the oven walls to allow heat to circulate. Preheat the oven to 450F. Gently punch down the dough. Divide the dough in half, then set half aside, covered, while you work with the rest. Divide the other half into 8 equal pieces and flatten each piece with lightly floured hands. Roll out each piece to a circle 8-9 inches in diameter and less than ¼ inch thick. Keep the rolled-out breads covered until ready to bake, but do not stack. Place 2 breads, or more if your oven is large enough, on the quarry tiles of baking sheets, and bake for 2-3 minutes, or until each bread has gone into a full “balloon.” Keep the baked breads together in a large kitchen towel to keep them warm and soft while you bake the remaining rolled out breads. Then repeat with the rest of the dough. To cook on top of the stove: Preheat a 9-inch or larger griddle or cast-iron skillet over medium high heat. When hot, lightly grease the surface of the griddle with a little oil. Gently put one bread onto the griddle. Cook for 15 o 20 seconds, then gently turn over. Cook for about 1 minute, until big bubbles begin to appear. Turn the bread again to the first side, and cook unto the bread balloons fully. To help the process along, you can press gently with a towel on those areas where bubbles have already formed, trying to push the air bubbles into areas that are still flat. The breads should take no more than 3 minutes to cook, and, likewise, they shouldn’t cook so fast they begin to burn. There is no need to regrease the griddle after each bread, but you might want to do so after each 4-5 breads. |
||
|
||
|
gracoman
Chef 
Joined: 09 August 2013 Status: Offline Points: 887 |
Post Options
Thanks(0)
Quote Reply
Posted: 01 February 2014 at 09:04 |
|
|
Great timing on this one. I have Syrian bread planned for tomorrow. I'm guessing Syrian and Pita breads are the same or very similar with the possible exception that Syrian has forked holes to keep the breads from forming a pocket. Any comments on this?
|
||
|
||
|
HistoricFoodie
Admin Group
Joined: 21 February 2012 Location: Kentucky Status: Offline Points: 4945 |
Post Options
Thanks(0)
Quote Reply
Posted: 01 February 2014 at 13:27 |
|
|
I'm not sure that "Syrian" has any meaning in this context, Gracoman. You could be referring to any of a dozen or more flatbreads. Many of these are endemic to the whole region, others tend to be identified with a more specific region.
For example, lachmanjan, a topped flatbread, is thought to be Syrian. But it bears a striking resemblance to the Turkish lambjun. On the other hand, there's no question that felaveri is Syrian. But it's a very thin bread, sort of like a soft lavash. Etc. Generally speaking, it seems to me, just IDing any of these breads as being Eastern Mediterranean is the safest way to go. I've seen flatbreads such as you describe available commercially. As you say, they look like pitas that are not hollow, pockmarked with a fork. The commercial ones are not identified as being Syrian. But we used to go to a Syrian bakery in Brooklyn that made giant versions of these. I mean, think of a non-pocketed pita 14-18 inches in diameter, and topped with olive oil and za'atar; olive oil and thyme, or merely sesame seeds. I have no idea what they'd be called in Syrian. Alford and Duguid have a version, rolled to a more normal size, which they call khubs zatar (and translated as thyme bread), which they say is found in Syria, Lebanon, Israel, and Egypt. Yet another, similar bread, is manaaeesh. Rather than being baked in individual rounds, however, it's shaped into large rectangles (think of a thin focaccia) and topped with olive oil, salt, and za'atar. Manaaeesh is almost always identified as being Lebanese, but I'm sure similar breads are found throughout the region. Why don't you post your recipe, and we'll see if we can fit it more closely. |
||
|
||
|
gracoman
Chef
Joined: 09 August 2013 Status: Offline Points: 887 |
Post Options
Thanks(0)
Quote Reply
Posted: 01 February 2014 at 15:05 |
|
|
The term Syrian bread sounded generalized to me too. I've looked at quite a few Middle Eastern flatbread recipes and they are all pretty similar with varying degrees of oil/salt/sugar.
The bread I'm after will hold a filling of spiced chicken and grilled vegetables. A Middle Eastern ubiquitous sandwich called Shish Taouk with Toum. Shish Taouk is translated as skewered chicken. Toum is a garlicky paste or sauce always served with this dish. Shish Taouk may also be served with rice but I'm going for the street food type sandwich. The "Syrian" bread was throwing me. I plan on posting results here. Here is one recipe labeled Syrian Bread
I don't plan on using the bread machine. |
||
|
||
|
HistoricFoodie
Admin Group
Joined: 21 February 2012 Location: Kentucky Status: Offline Points: 4945 |
Post Options
Thanks(0)
Quote Reply
Posted: 02 February 2014 at 05:25 |
|
|
Watch the timing on these, GM. Five minutes might be a bit much. Most of these breads only take 2-3 minutes to bake.
If you skip the fork-pricking, don't be surprised if these do balloon up and form pockets. This is, after all, a basic pita recipe with a slightly higher sugar content. |
||
|
||
|
gracoman
Chef
Joined: 09 August 2013 Status: Offline Points: 887 |
Post Options
Thanks(0)
Quote Reply
Posted: 02 February 2014 at 08:02 |
|
|
Thanks for the heads up on timing.
I may use a slightly different recipe and cook them in a pre-heated cast iron skillet on the stove top. |
||
|
||
|
HistoricFoodie
Admin Group
Joined: 21 February 2012 Location: Kentucky Status: Offline Points: 4945 |
Post Options
Thanks(0)
Quote Reply
Posted: 02 February 2014 at 09:12 |
|
|
Or not. No reason this recipe shouldn't work on the stovetop.
|
||
|
||
|
TasunkaWitko
Admin Group
Joined: 25 January 2010 Location: Chinook, MT Status: Offline Points: 9389 |
Post Options
Thanks(0)
Quote Reply
Posted: 02 February 2014 at 23:36 |
|
|
Great discussion, guys ~ keep it coming, I say....
An acquaintance on another forum caught this post, and offered up these words:
memories and impressions like this are exactly what I try to evoke when I post my pictorials, and I was pretty honoured that I was able to take a guy back to an experience that obviously left a positive impression.
|
||
|
If you are a visitor and like what you see, please click here and join the discussions in our community!
|
||
|
||
|
HistoricFoodie
Admin Group
Joined: 21 February 2012 Location: Kentucky Status: Offline Points: 4945 |
Post Options
Thanks(0)
Quote Reply
Posted: 03 February 2014 at 04:44 |
|
|
Well, let's not forget the flatbread discussions we had when I wrote my bread making primer.
The actual flatbread chapter can be found here: http://www.foodsoftheworld.activeboards.net/the-staff-of-life-a-primer-on-baking-bread_topic3089_page2.html But there is additional talk scattered here and there throughout it. When we went in search of the original Babylonian bread, lot's of insights emerged, particularly the techniques used by desert people provided by Ahron. That thread can be found at http://www.foodsoftheworld.activeboards.net/babylonian-bread_topic3336.html?KW=barley+bread And, of course, a cruise down the bread & grains forum reveals lots of flatbread entries. |
||
|
||
|
Post Reply
|
|
 Tweet
Tweet
|
| Forum Jump | Forum Permissions You cannot post new topics in this forum You cannot reply to topics in this forum You cannot delete your posts in this forum You cannot edit your posts in this forum You cannot create polls in this forum You cannot vote in polls in this forum |


 Topic Options
 North of the modern city of Baghdad begins Kurdistan, a hilly, grassy region in Iraq, Iran and Turkey with a pleasant, cool climate. It has few important modern cities or spectacular ruins; its peasants lead lives that for centuries have changed hardly at all. But historically, Kurdistan is in a class by itself; what makes the region unique is an ancient event in the history of food and mankind - the domestication of plants and animals.
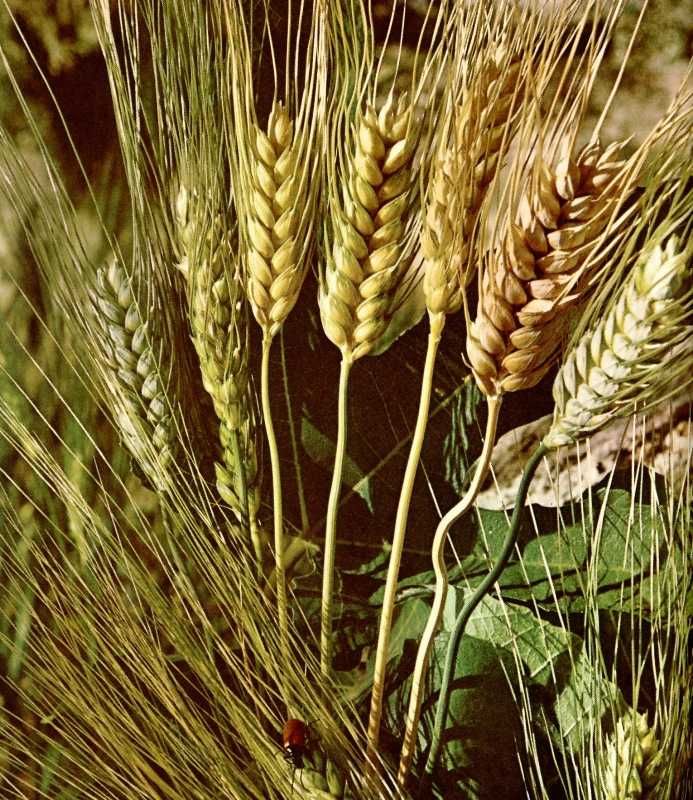 According to all available archeological evidence, this great achievement first took place here. It gave man his first dependable and manageable food supply, and it provided the foundation upon which was built all civilisation: villages, cities, nations, empires, writing, literature, law and science.... No one knows what those first farmers of Kurdistan looked like, what colour their faces were or what language they spoke.... But...these men and women turned mankind from total dependence on the accidental gifts of nature to control over sources of food.
 Here's the recipe, from Time/Life:
 Left to right: olive oil, honey (in place of sugar), flour, yeast and kosher salt. If you do any baking at all, every one of these items is most likely already in your kitchen or pantry.
At its heart, we're simply making bread here, and it's quite easy to do; by following a few simple steps, you can assure yourself of best results. Following the recipe, I began by proofing the yeast, which is as simple as adding the yeast to 1/4 cup of blood-warm water, then adding the yeast and a dollop of honey:
Left to right: olive oil, honey (in place of sugar), flour, yeast and kosher salt. If you do any baking at all, every one of these items is most likely already in your kitchen or pantry.
At its heart, we're simply making bread here, and it's quite easy to do; by following a few simple steps, you can assure yourself of best results. Following the recipe, I began by proofing the yeast, which is as simple as adding the yeast to 1/4 cup of blood-warm water, then adding the yeast and a dollop of honey:
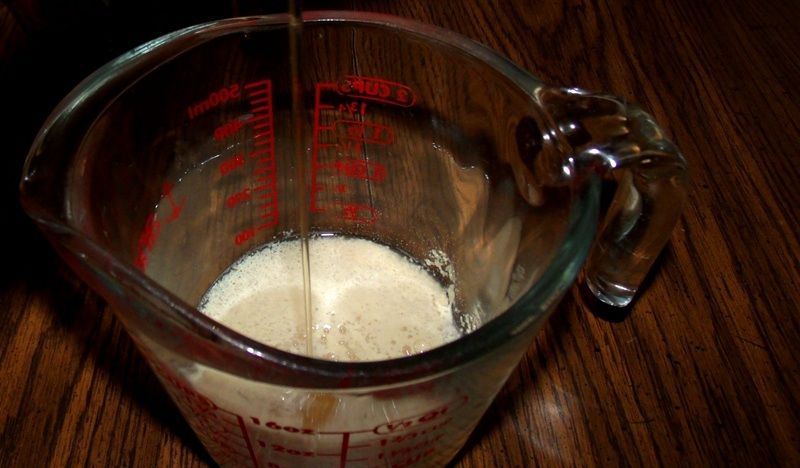 Any sugar, honey or similar thing can be used; I chose honey because it seemed to me to be a more traditional and rustic choice for the region.
After letting this concoction rest a couple of minutes, I gave it a gentle stir to dissolve and then placed the mixture into our (turn-off) oven for about 5 minutes so that it could double in volume. Meanwhile, I mixed 8 cups of flour and a generous two teaspoons of salt in a large bowl. When the yeast mixture was ready, I poured it into a well that I had made in the centre of the flour:
Any sugar, honey or similar thing can be used; I chose honey because it seemed to me to be a more traditional and rustic choice for the region.
After letting this concoction rest a couple of minutes, I gave it a gentle stir to dissolve and then placed the mixture into our (turn-off) oven for about 5 minutes so that it could double in volume. Meanwhile, I mixed 8 cups of flour and a generous two teaspoons of salt in a large bowl. When the yeast mixture was ready, I poured it into a well that I had made in the centre of the flour:
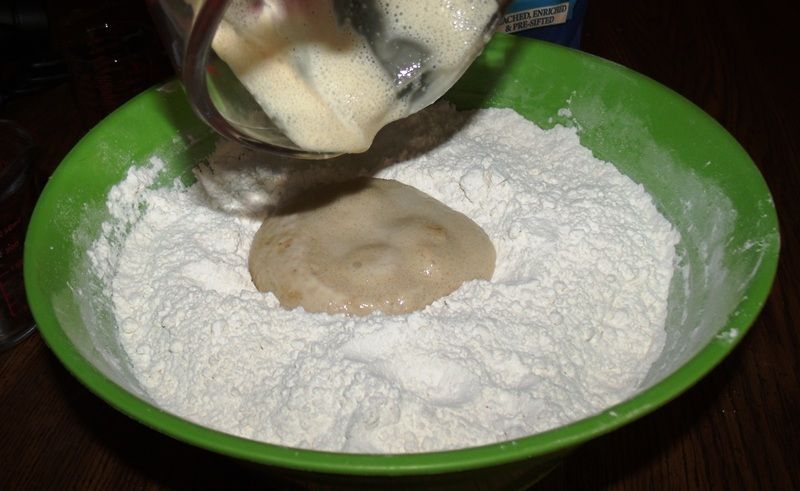 I then added most of the water called for in the recipe (2 cups); once again, the water was approximately 100 degrees, in order to best promote yeast action.
At this point, I departed from the recipe just a bit in order to employ a very simple technique that I've found to be quite helpful in bread making. Rather than adding the olive oil to the mixture right away, I stirred the mixture around and worked the water into the flour, adding about a quarter-cup more water, until it seemed like it would be close to the "correct" consistency (taking into account the oil that was yet to be added). I then let the flour-and-water mixture (it wouldn't be quite right to call it dough) rest for about 20 minutes before adding the oil. This process is called autolysation; there's quite a bit of science to the concept, but basically, what it does is to allow the flour to better absorb the water without the blocking interference of the oil. It is a very, very easy way to improve the bread that you make; all you have to do is simply cover the bowl and....wait for 20 minutes or so, before adding the oil.
After the 20-minute autolysation period (which sounds a lot more high-tech and scientific than it actually is), I added the oil to the flour/water mixture and worked it in, kneading the dough for about 20 minutes; as any amateur or experienced bread maker knows, this is quite a workout, and I was glad when it was over. The dough still seemed a little "stiff" or "dry," but I decided to give it a shot; looking back, I probably should have added a little more water for better results where the expansion and pocket-forming are concerned, since the puffiness and resulting pocket care caused be steam action. The bread I ended up with was just fine, and I want to stress that point, but I believe it could have been just a bit better had I added maybe a quarter-cup more water to the dough.
In any case, I formed the dough into a ball, then placed it in the lightly-oiled bowl and worked a drizzle of olive oil onto the surface:
I then added most of the water called for in the recipe (2 cups); once again, the water was approximately 100 degrees, in order to best promote yeast action.
At this point, I departed from the recipe just a bit in order to employ a very simple technique that I've found to be quite helpful in bread making. Rather than adding the olive oil to the mixture right away, I stirred the mixture around and worked the water into the flour, adding about a quarter-cup more water, until it seemed like it would be close to the "correct" consistency (taking into account the oil that was yet to be added). I then let the flour-and-water mixture (it wouldn't be quite right to call it dough) rest for about 20 minutes before adding the oil. This process is called autolysation; there's quite a bit of science to the concept, but basically, what it does is to allow the flour to better absorb the water without the blocking interference of the oil. It is a very, very easy way to improve the bread that you make; all you have to do is simply cover the bowl and....wait for 20 minutes or so, before adding the oil.
After the 20-minute autolysation period (which sounds a lot more high-tech and scientific than it actually is), I added the oil to the flour/water mixture and worked it in, kneading the dough for about 20 minutes; as any amateur or experienced bread maker knows, this is quite a workout, and I was glad when it was over. The dough still seemed a little "stiff" or "dry," but I decided to give it a shot; looking back, I probably should have added a little more water for better results where the expansion and pocket-forming are concerned, since the puffiness and resulting pocket care caused be steam action. The bread I ended up with was just fine, and I want to stress that point, but I believe it could have been just a bit better had I added maybe a quarter-cup more water to the dough.
In any case, I formed the dough into a ball, then placed it in the lightly-oiled bowl and worked a drizzle of olive oil onto the surface:
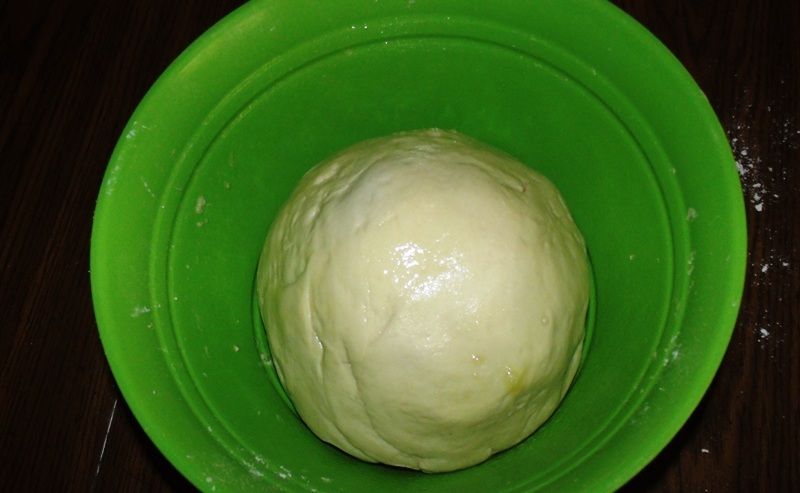 I then covered the bowl and set it back in the (turned off!) oven so that the dough could rise for just under an hour; during this time, it doubled in size, and then a little more.
I then took it out of the oven and punched the dough down; then worked it into 8 balls of equal size:
I then covered the bowl and set it back in the (turned off!) oven so that the dough could rise for just under an hour; during this time, it doubled in size, and then a little more.
I then took it out of the oven and punched the dough down; then worked it into 8 balls of equal size:
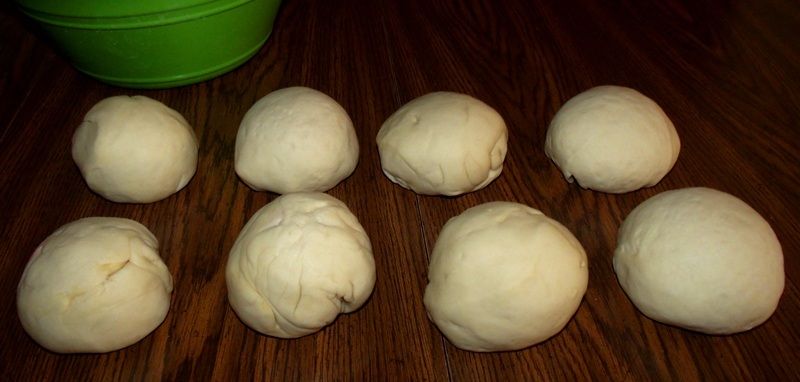 Looking at the photo above, it occurs to me that I could have done a much better job of forming the balls; as you can see, most of mine are not smooth and even, and this may or may not have had an effect later on, during baking. The "folds" and "wrinkles" - along with the other factors mentioned above - might have inhibited the puffing and pocket forming, but I can't say for sure.
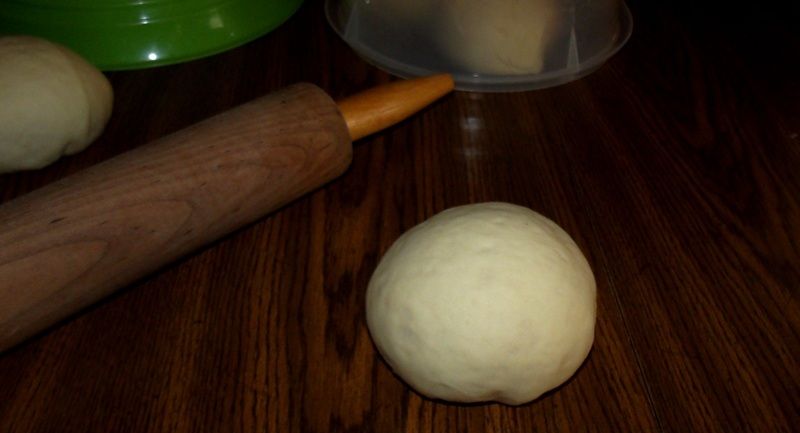
After covering the dough balls and letting them rest for another 30 minutes, I got down the business of making the khoubz loaves. I repeated the following procedure 8 times, one for each dough ball:
Looking at the photo above, it occurs to me that I could have done a much better job of forming the balls; as you can see, most of mine are not smooth and even, and this may or may not have had an effect later on, during baking. The "folds" and "wrinkles" - along with the other factors mentioned above - might have inhibited the puffing and pocket forming, but I can't say for sure.
After covering the dough balls and letting them rest for another 30 minutes, I got down the business of making the khoubz loaves. I repeated the following procedure 8 times, one for each dough ball:
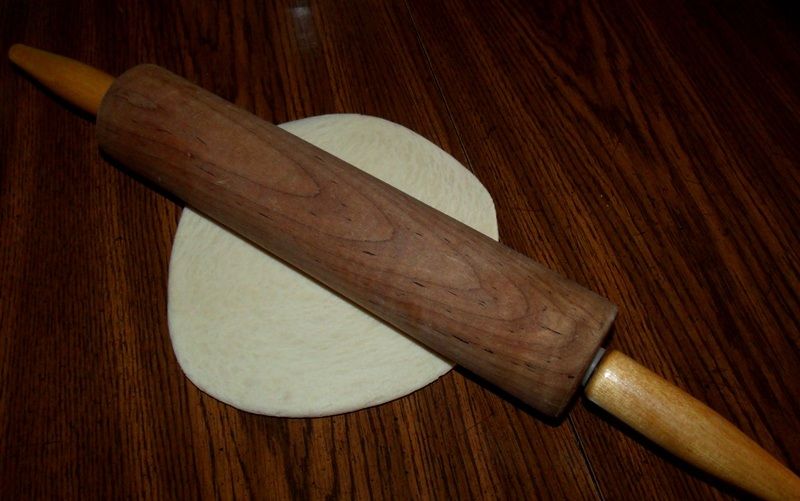
 First, I rolled each ball out to a diametre of about 8 to 9 inches, trying to keep the disks around an eighth of an inch thick:
 I then placed each disk on a baking sheet that had been dusted with kosher salt:
 Sea salt, of course, would work just as well.
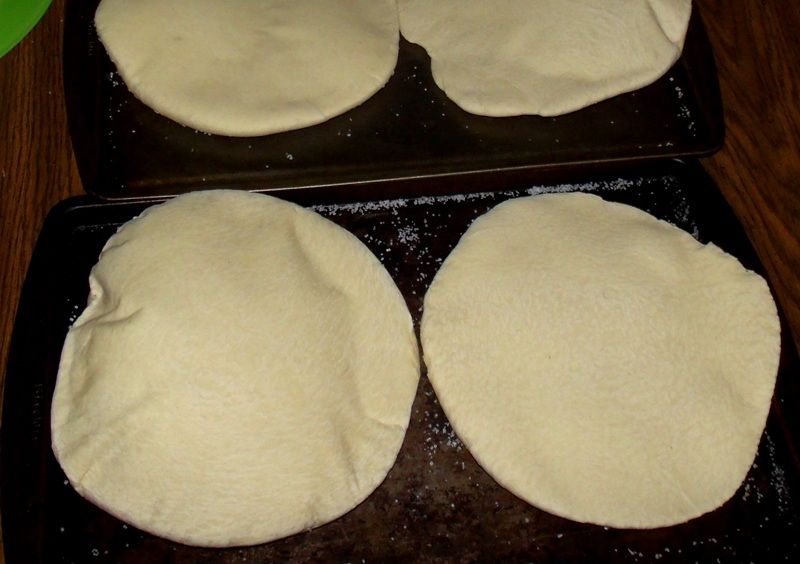
Before long, I had finished rolling out one batch of 4 disks (half the dough) - covering 2 baking sheets:
Sea salt, of course, would work just as well.
Before long, I had finished rolling out one batch of 4 disks (half the dough) - covering 2 baking sheets:
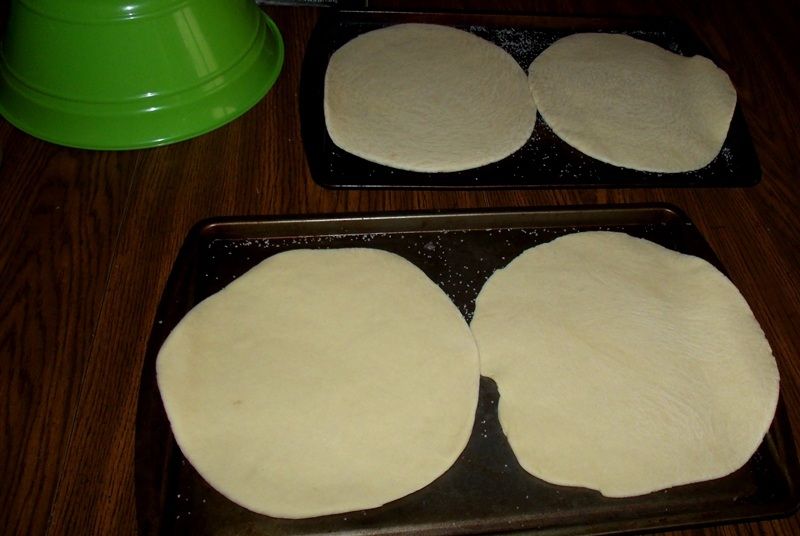 I covered the disks and let them rest for half an hour, while I pre-heated the oven to 500 degrees. Toward the end of the resting period, I rolled out the other four dough balls and covered them, so that they could have enough time to rest while the first batch of khoubz was baking
As you can see, there is a lot of "waiting" or "resting" time for the dough in this recipe. I don't know if that much waiting (as called for in the recipe) is strictly necessary, but when making a recipe for the first time, I almost always follow it as closely as I can, unless I see a good reason to depart from it (such as the autolysation step above). If anyone has any thoughts on the amount of resting time called for in the recipe, please feel free to comment.
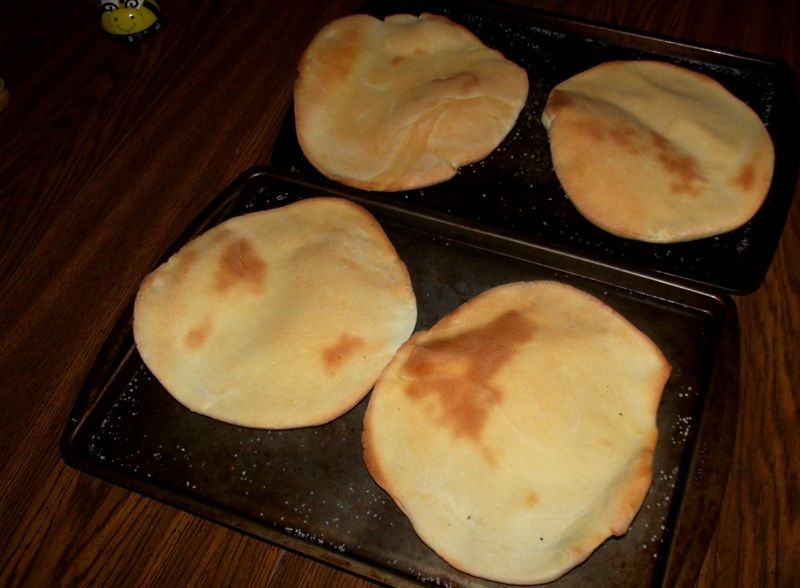
Once the oven had finished pre-heating, I baked the first batch of khoubz; following the instructions in the recipe, I placed them on the lowest shelf of the oven for 5 minutes, before moving them up to the middle region of the oven to finish baking for another 5 minutes. Here is how the first batch looked coming out of the oven:
I covered the disks and let them rest for half an hour, while I pre-heated the oven to 500 degrees. Toward the end of the resting period, I rolled out the other four dough balls and covered them, so that they could have enough time to rest while the first batch of khoubz was baking
As you can see, there is a lot of "waiting" or "resting" time for the dough in this recipe. I don't know if that much waiting (as called for in the recipe) is strictly necessary, but when making a recipe for the first time, I almost always follow it as closely as I can, unless I see a good reason to depart from it (such as the autolysation step above). If anyone has any thoughts on the amount of resting time called for in the recipe, please feel free to comment.
Once the oven had finished pre-heating, I baked the first batch of khoubz; following the instructions in the recipe, I placed them on the lowest shelf of the oven for 5 minutes, before moving them up to the middle region of the oven to finish baking for another 5 minutes. Here is how the first batch looked coming out of the oven:
 As you can see, one of them puffed up quite nicely; two others puffed up moderately, and one didn't seem to puff up much at all:
 I also think that they could have used just a few moments longer in the oven - surely no more than a minute; the bread was done inside, though, and that is the primary thing.
A quick sampling of one loaf was almost like taking a bite of heaven; soft, warm, fresh-baked bread - with just a hint of salt - centuries of tradition wrapped up in a single bite. Good stuff!
After giving the oven a few short minutes to recover its temperature, I slid the second batch into the oven. I followed the same procedure as above, but the second batch ended up being in the oven a little too long, due to a knock at our door. By the time I was able to rescue them from the oven, perhaps 2 minutes of additional time had baked them, turning them into this:
I also think that they could have used just a few moments longer in the oven - surely no more than a minute; the bread was done inside, though, and that is the primary thing.
A quick sampling of one loaf was almost like taking a bite of heaven; soft, warm, fresh-baked bread - with just a hint of salt - centuries of tradition wrapped up in a single bite. Good stuff!
After giving the oven a few short minutes to recover its temperature, I slid the second batch into the oven. I followed the same procedure as above, but the second batch ended up being in the oven a little too long, due to a knock at our door. By the time I was able to rescue them from the oven, perhaps 2 minutes of additional time had baked them, turning them into this:
 Nothing wrong with them at all as far as baking goes - and, in fact, some would even argue that they are better-tasting with a little extra baking; but as you can see, very little puffing up. Three out of the four loaves in the photo really could have been formed better, as well.
Nevertheless, I had made some very delicious Levantine bread, and I was looking forward to enjoying it with my supper. I wrapped the loaves and put them aside to rest until the rest of the meal was ready, at which time I served them simply, stacked on a platter:
Nothing wrong with them at all as far as baking goes - and, in fact, some would even argue that they are better-tasting with a little extra baking; but as you can see, very little puffing up. Three out of the four loaves in the photo really could have been formed better, as well.
Nevertheless, I had made some very delicious Levantine bread, and I was looking forward to enjoying it with my supper. I wrapped the loaves and put them aside to rest until the rest of the meal was ready, at which time I served them simply, stacked on a platter:
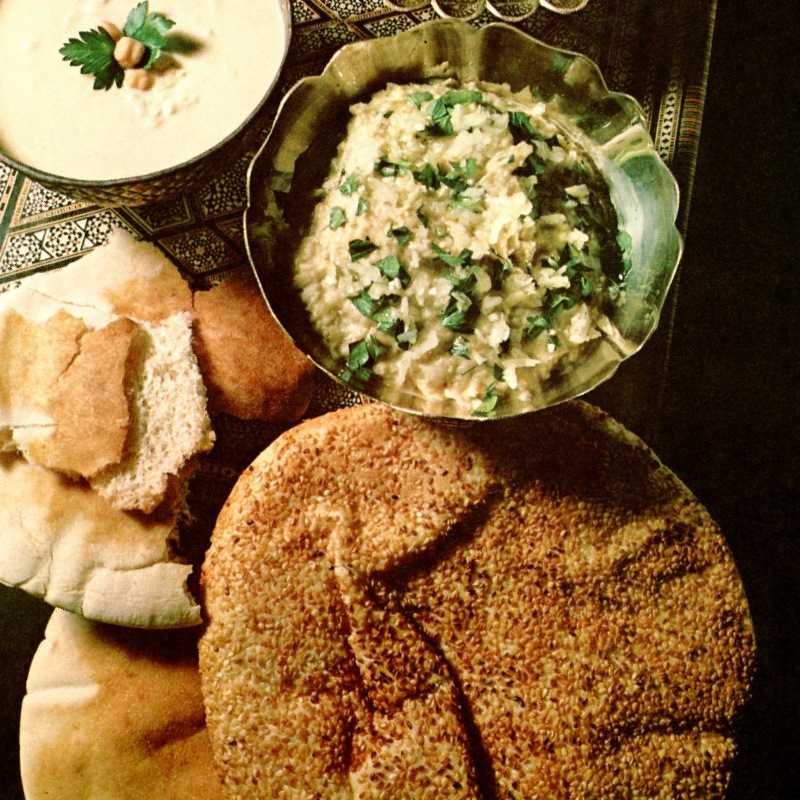
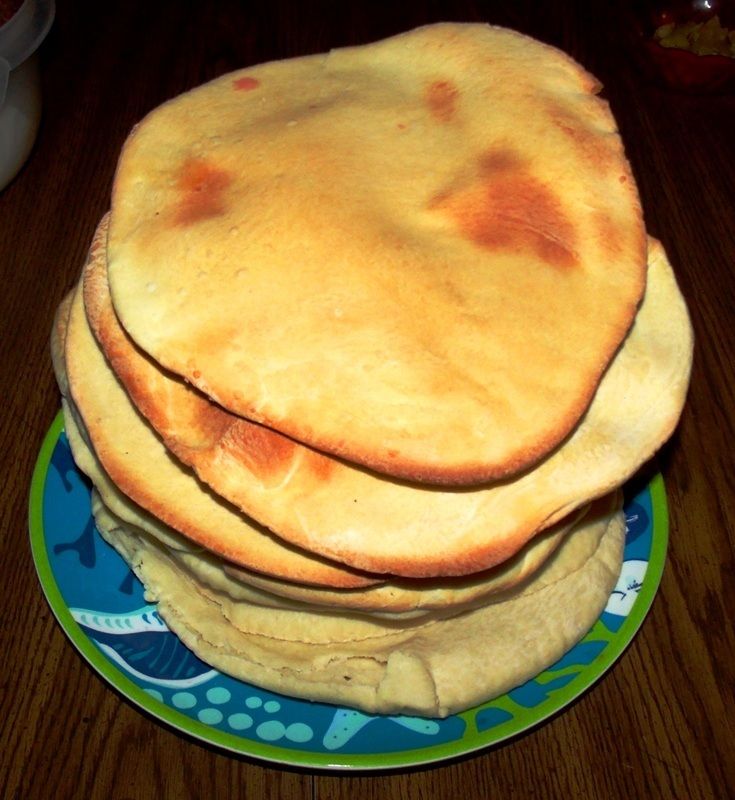 This bread, as I have been saying, tasted simply wonderful; it is amazing to me that the same ingredients - universal for bread around the world - can take on different characteristics depending on the proportions and methods used - even the shape that the bread is formed into, sometimes. The darker loaves were a little crisper on the outside, with a toasted flavour wrapping around the tender interior; the lighter loaves were soft throughout, and all had a delicious flavour, enhanced by the bit of salt clinging to the bottoms of the disks. The khoubz made an excellent accompaniment to our
  Bread is one of the oldest creations of mankind as a society; it nourishes us, comforts us and is a universal symbol of hospitality and life. Beyond that, it is a testament to man's mastery over the never-ending quest for survival, as well as our stewardship of the land that provides for all of our needs. It is no accident that - once early people no longer needed to spend every waking moment scrapping and scrabbling for food - time, imagination, effort and energy were liberated in favour of higher pursuits such as mathematics, art, literature, law, science, commerce, religion, philosophy and other civilisation-building concepts. If you really want experience the paradigm-shifting miracle that was discovered through the domestication of wheat, then I urge you to throw yourself into this bread, and touch the past.
Thanks for taking the time to embark on the journey with me; as always, questions, comments and discussion are encouraged!
Ron
Bread is one of the oldest creations of mankind as a society; it nourishes us, comforts us and is a universal symbol of hospitality and life. Beyond that, it is a testament to man's mastery over the never-ending quest for survival, as well as our stewardship of the land that provides for all of our needs. It is no accident that - once early people no longer needed to spend every waking moment scrapping and scrabbling for food - time, imagination, effort and energy were liberated in favour of higher pursuits such as mathematics, art, literature, law, science, commerce, religion, philosophy and other civilisation-building concepts. If you really want experience the paradigm-shifting miracle that was discovered through the domestication of wheat, then I urge you to throw yourself into this bread, and touch the past.
Thanks for taking the time to embark on the journey with me; as always, questions, comments and discussion are encouraged!
Ron