"dried beef" (aka "chipped beef") from venison
Printed From: Foods of the World Forum
Category: Other Food-Related Topics
Forum Name: Curing of Meats, Charcuterie and Smokehouse Specialties
Forum Discription: From basic sausages and smoked bacon to specialised meat products such as cured hams or other charcuterie, this is the place to discus it!
URL: http://foodsoftheworld.ActiveBoards.net/forum_posts.asp?TID=1603
Printed Date: 26 March 2026 at 17:34
Topic: "dried beef" (aka "chipped beef") from venison
Posted By: TasunkaWitko
Subject: "dried beef" (aka "chipped beef") from venison
Date Posted: 21 December 2011 at 23:39
|
based on a lot of recent interest in this subject, and because i've always wanted to try making what is essentially a "ham" from venison, i decided to do some research and give this a try, using a hind quarter roast from a deer we shot this year.
note - this is not jerky, which is a meat product that is totally dried. "dried" or "chipped" beef is a different product altogether. we've all seen the little jars in the store, and probably have had chipped beef on toast or, for those in the military, SOS; but the stuff in the jar simply doesn't compare to making it from scratch, either from beef or, even better, venison. with some seasoning and preparation differences, this project is a not-so-distant cousin to my pastramă project:
http://foodsoftheworld.activeboards.net/forum_posts.asp?TID=917&title=project-pastram - http://foodsoftheworld.activeboards.net/forum_posts.asp?TID=917&title=project-pastram
therefore, there will be some crossover, and concepts that work well there will similarly be effective here.
here are some pictures showing a breakdown of muscle groups etc from the hind quarter of a deer. the pictures were lifted from another forum:
http://www.archerytalk.com/vb/showthread.php?t=730292&page=1 - http://www.archerytalk.com/vb/showthread.php?t=730292&page=1
the link above has a lot of extra information that is very good for those of you looking for information on butchering deer; the method shown is very close to what we do with our own deer.
after the hindquarter has been removed from the carcass, it is boned out. the complete, boned hindquarter will look something like this:
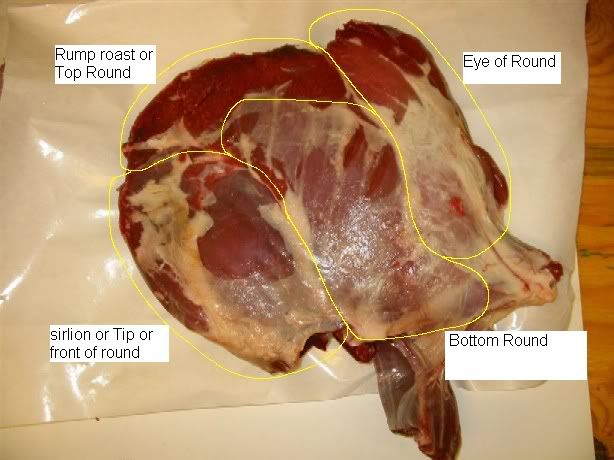 Picture Credit: http://i28.photobucket.com/albums/c239/212007154/sausage/hind_quarter2small-1.jpg - http://i28.photobucket.com/albums/c239/212007154/sausage/hind_quarter2small-1.jpg
the mass above is separated into each individual muscle group (roast) and then trimmed of all fat, silverskin, membrane etc.:
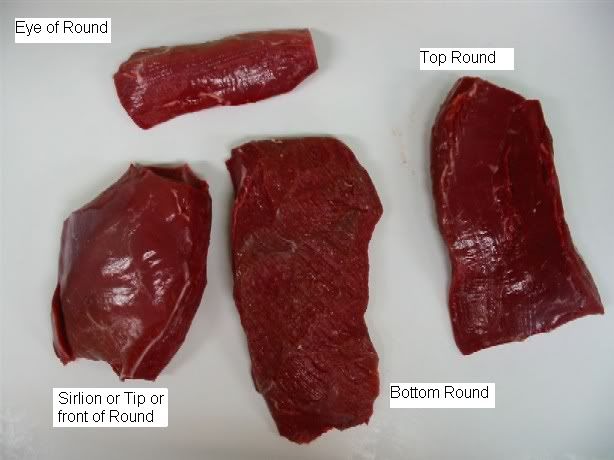 Picture Credit: http://i28.photobucket.com/albums/c239/212007154/sausage/hind_quarter1small-1.jpg - http://i28.photobucket.com/albums/c239/212007154/sausage/hind_quarter1small-1.jpg
as mentioned above, this project will be similar to romanian pastramă:
http://foodsoftheworld.activeboards.net/forum_posts.asp?TID=283&title=traditional-romanian-pastram - http://foodsoftheworld.activeboards.net/forum_posts.asp?TID=283&title=traditional-romanian-pastram
but will employ a simple cure consisting of brown sugar and morton's tenderquick. the finished product will not be unlike pastramă, or greek pastourma:
http://foodsoftheworld.activeboards.net/pastourma_topic288.html - http://foodsoftheworld.activeboards.net/pastourma_topic288.html
or swiss bündnerfleisch:
http://foodsoftheworld.activeboards.net/bndnerfleisch_topic548.html - http://foodsoftheworld.activeboards.net/bndnerfleisch_topic548.html
or even south african biltong:
http://foodsoftheworld.activeboards.net/forget-jerky-make-yourself-some-biltong_topic214.html - http://foodsoftheworld.activeboards.net/forget-jerky-make-yourself-some-biltong_topic214.html all of these products are cured, semi-dry cuts of meat; sometimes smoked, always preserved - delicious throwbacks to a time before refrigeration made it easy to keep perishable meats for long periods of time. if this were pork, we would call it a ham; however, the closest product to what we are making is referred to as "dried beef" (not to be confused with jerky); hence, the nomenclature. in some areas, the same product is also referred to as "chipped beef" - http://en.wikipedia.org/wiki/Dried_beef - wikipedia elaborates on this:
since i am rather fond of the product, i've never felt the need to assign a derogatory term for it, and in my family it was simply known as "chipped beef."
but i digress....here we go with the preparation of this product, which, for the sake of convenience, i'll simply call "dried beef."
here's the aged and trimmed hind-quarter roast that i will be using, from our 2011 mule deer doe:
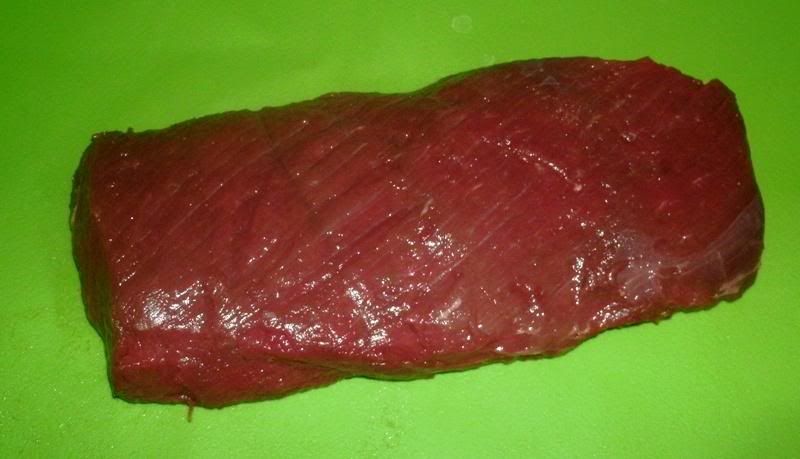 i always have trouble telling the top and bottom rounds apart, but i am pretty sure that it is the top round. as you can see, it's been trimmed of membranes, silverskin, fat etc. and is a nice, clean, wonderful hunk of good montana venison - all ready for the project!
as any hunter knows, the weight of any venison roast varies according to the size of the deer, the amount of trimming necessary and other factors. i had actually bought a digital kitchen scale for this project (the only other one i had went to 1 pound only), but since i had misplaced the batteries (and they were those round, nickel-sized ones that aren't available in small towns on sunday evenings), i had to guesstimate the weight. i knew it was more than a pound, but not quite 2 pounds, so all of my measurements (cure, time for curing etc.) were for a 2-pound roast, in order to be on the safe side of the cure.
since i was measuring for 2 pounds of meat, i used 2 tablespoons of tenderquick, according to package directions for a dry cure. since the roast was in actuality a little less than 2 pounds, the amount of cure was slightly more than recommended; however, it seems to me that it is better to have slightly more than less, as long as you don't go over by a large amount, especially in light of the lack of ability to get an accurate weight for the meat.
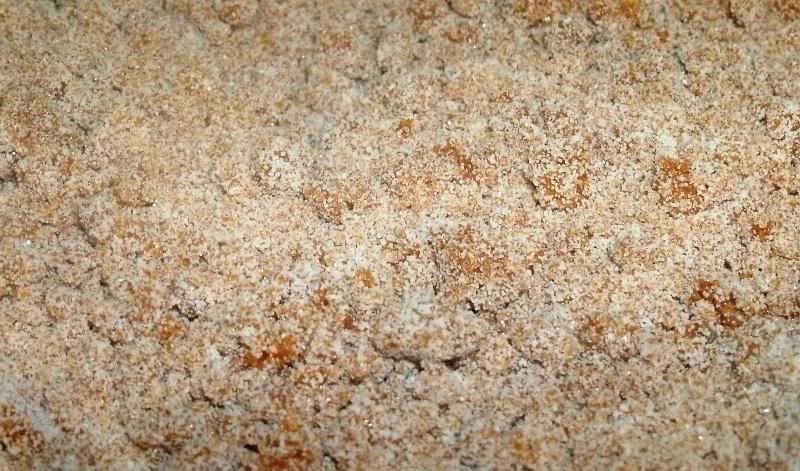
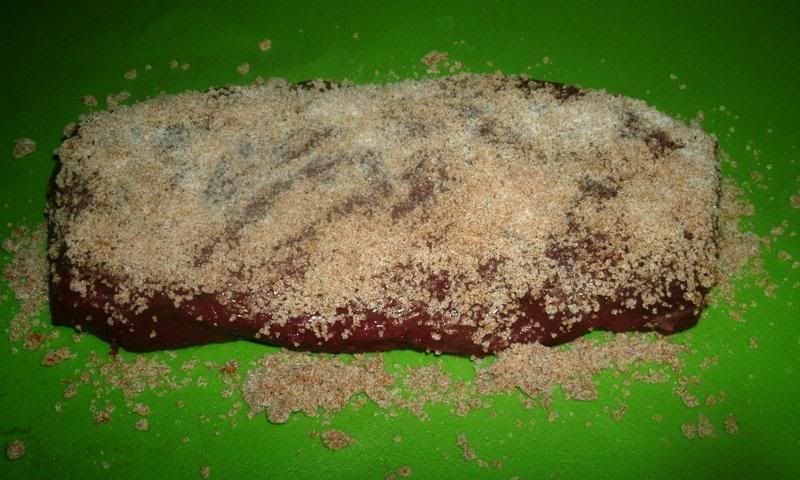
for this simple fare, i wanted to use a simple cure and added only an equal amount of dark brown sugar to the tenderquick: 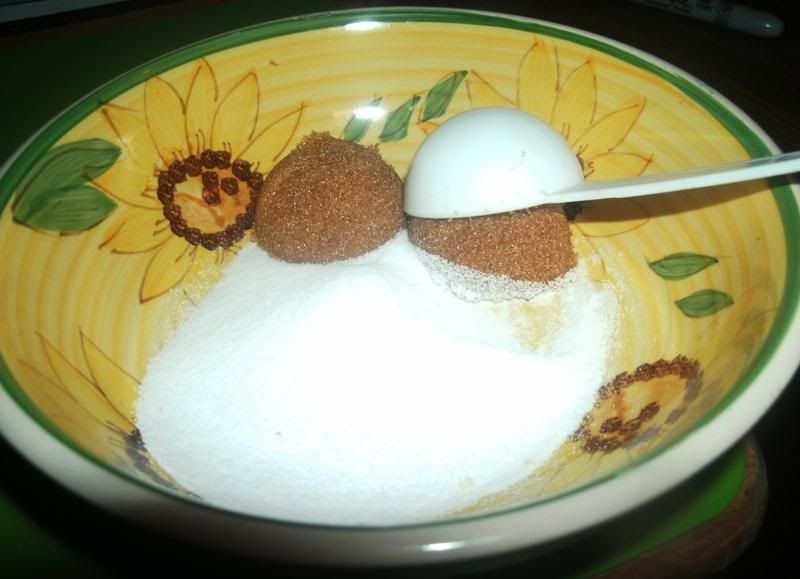 i then stirred the sugar and tenderquick together in order to blend them thoroughly:
 and applied the mixture to both sides of the roast:
 next, i laid the roast in a vacuum seal bag, then i emptied any "leftover" cure and sugar into the bag as well. since i prepared the roast on a flexible sheet of baking silicone, it was easy to fold and dump into the bag.
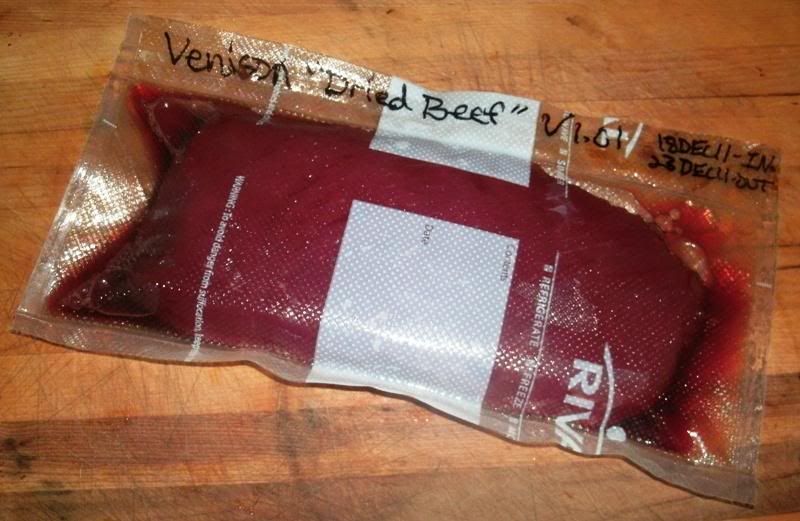
then i vacuum-sealed and labeled the bag: 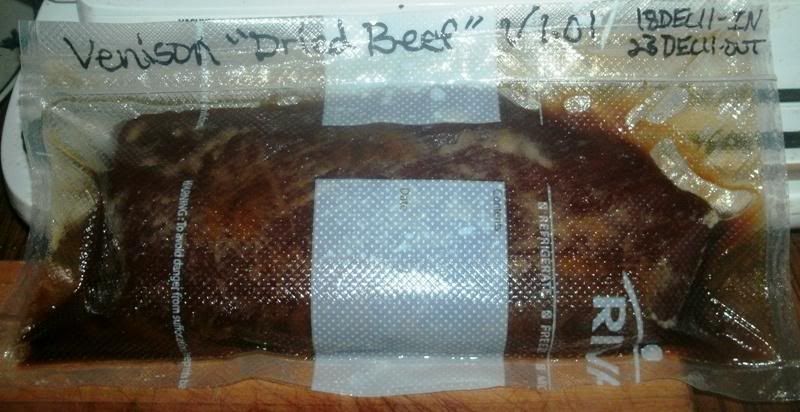 the vacuum-seal method worked very well during my most recent gravlax project:
http://foodsoftheworld.activeboards.net/forum_posts.asp?TID=1105&title=a-new-gravlax-project - http://foodsoftheworld.activeboards.net/forum_posts.asp?TID=1105&title=a-new-gravlax-project
so i decided to use it for this curing project as well. the vacuum seems to help with the absorption and osmosis that take place during brining, and the seal of course prevents any chance of leakage. for the label, i included the project, the date i began the cure and the date that the cure would finish.
since the meat was between 1 and 2 inches in thickness, i calculated a curing time for 2 inches, consistent with the recommendations found here:
http://foodsoftheworld.activeboards.net/curing-meat-with-mortons-tenderquick_topic935.html - http://foodsoftheworld.activeboards.net/curing-meat-with-mortons-tenderquick_topic935.html
the total came to 4 days of curing time, but i am adding a little time for safety and - let's face it - to get me to the weekend so that i would actually be able to work on the project.
then, i put the roast in the refrigerator in order to let the cure work its magic. i've been turning and massaging the meat once each evening, in order to ensure that the cure is well-distributed.
that's it for now - more as it develops..... ------------- If you are a visitor and like what you see, please http://foodsoftheworld.activeboards.net/registration_rules.asp?FID=0" rel="nofollow - click here and join the discussions in our community! |
 Chipped beef is thinly sliced or pressed salted and dried beef. Some makers smoke the dried beef for more flavor. The modern product consists of small, thin, flexible leaves of partially dried beef, generally sold compressed together in jars or flat in plastic packets....
Replies:
Posted By: DIYASUB
Date Posted: 23 December 2011 at 19:49
| I'm one of the few people you'll ever meet who actually admits to liking SOS. Unfortunately, those little 3oz packages of chipped beef that I find in the supermarket are so overpriced that you practically have to apply for financing, so I'll be interested in seeing how this turns out. |
Posted By: TasunkaWitko
Date Posted: 28 December 2011 at 10:37
|
Alright, Bill - I think this is something you're going to like - and be sure that a certain bus driver also sees this, because I do believe this is exactly what he was looking for! It turned out exactly right, as far as I can tell, and I am actually impressed with myself for being able to achieve such results on the first try! When we last left you, Dear Reader, we had just put the venison roast and cure into a vacuum-seal bag and into the refrigerator to cure for at least 5 days. As it turned out, I didn't get to continue this project until the evening of the 25th of December, so it was a few more days than that, but no worries - a little bit of margin is just fine! Here we are after 7 days of curing, turning, massaging and light pressing:
I'm not sure if all of the steps above are necessary, considering the vacuum seal, but as I've said before, it sure didn't hurt. You can see that the curing process brought out quite a bit of moisture, and the venison has taken on a beautiful colour. I soaked the roast in ice-cold water for half an hour, in order to draw out excess saltiness:
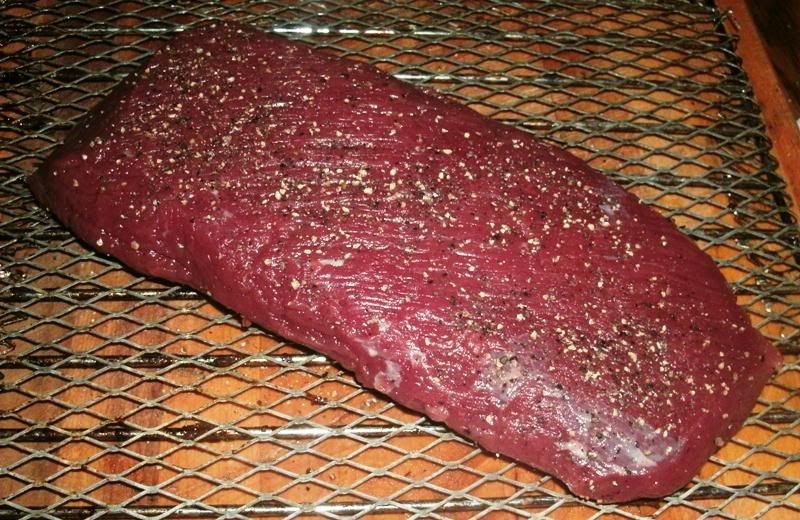
We didn't have any ice, so I kept it in the refrigerator for the allotted time in order to keep the meat as cold as possible. At this point, most folks do a "fry test," which involves slicing off a bit of the roast, frying it, and sampling it to see what the salt content is like, to determine if it needs to soak longer or not. I skipped this step, purely on a whim, but the "fry test" is advised, so that you can avoid any surprises that might hurt your chances for success. Next, after wiping the roast down with paper towels to dry, I ground some fresh, black pepper over both sides of the cured roast and set it out on one of my smoker racks:
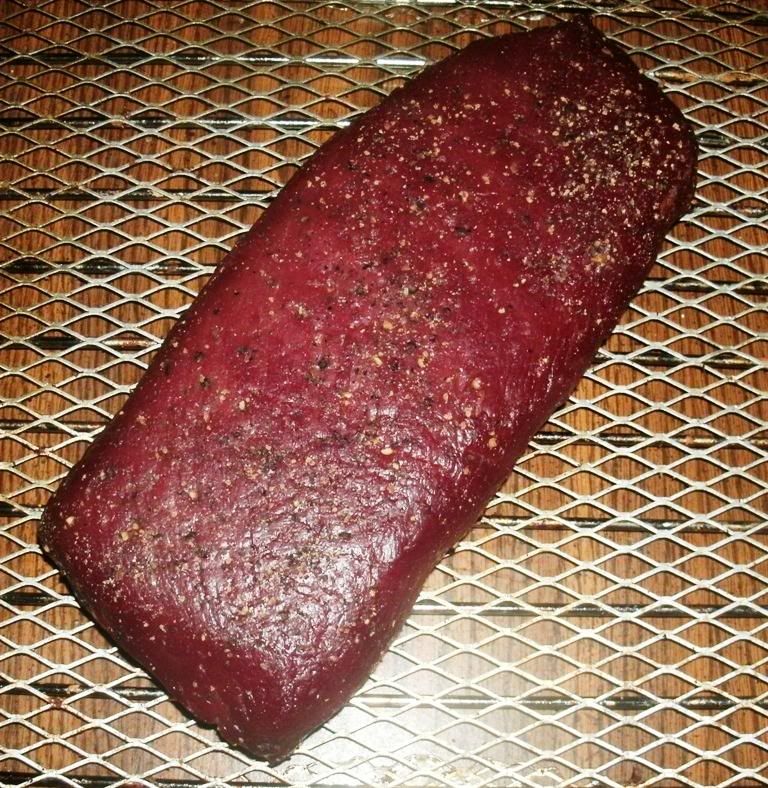
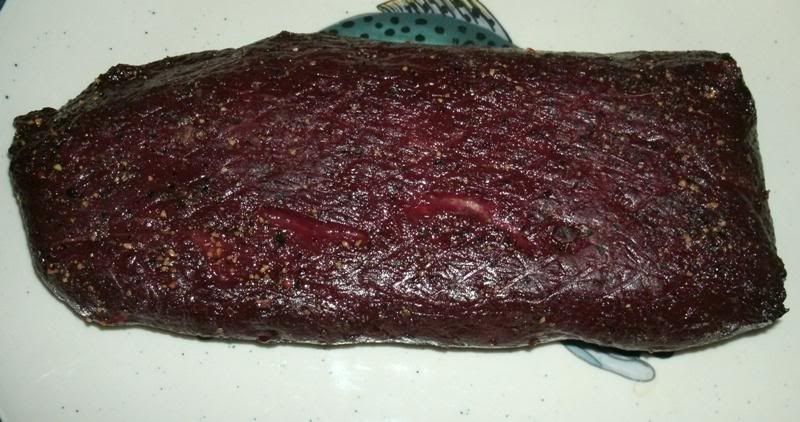
And put it in the refrigerator overnight, uncovered, in order to form a pellicle, which is nothing more than a slightly dry, slightly tacky surface; the pellicle helps with smoke penetration and a better final product. The next day, I set up my Little Chief and began smoking the roast over alder wood chips, which I felt would be a great compliment to the venison. The Little Chief is perfect for projects like this, which call for cooler smoking temperatures rather than "smoke cooking." Smoking is optional, but highly recommended for a wonderful touch. I found alder to be perfect for the venison, but that's no reason not to experiment. I imagine cherry, apple or maple would really be something, while hickory, oak, pecan or mesquite would lend wonderful properties of their own. Your imagination is your only boundary. After 8 hours or so of smoking, with some drying, here's what we had:
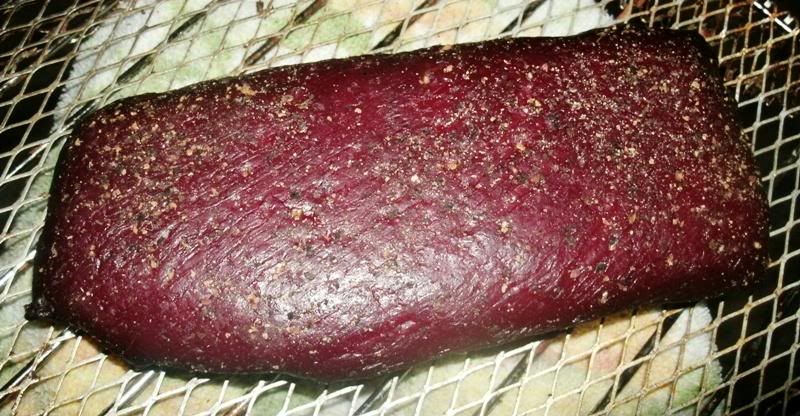
The aroma was outstanding, with the subtle alder adding a perfect undertone to the sweet-spicy smell of the venison, which had developed a semi-hard, semi-dry outer surface. It can't really be called a "crust," because it wasn't hard, but at the same time, it was firm. The best way to describe it would be an outer skin that was almost like a casing on a sausage. The interesting thing about this is that it allows the meat inside to stay just about right - not too moist and not too dry - while allowing the seasonings, cure and smoke to work their magic. For this project, I chose to finish it inside, so I put the rack in the oven on the lowest setting for about 3 hours, to get it up in the 145ish-degree range. I apologize that I can't be more precise, but it seems that my temperature probe thermometer was "misplaced" since I used it last. Children are the joy of life, but at times it is a challenge to remember that. In any case, here's how we looked after some time in the oven to come up to temperature:
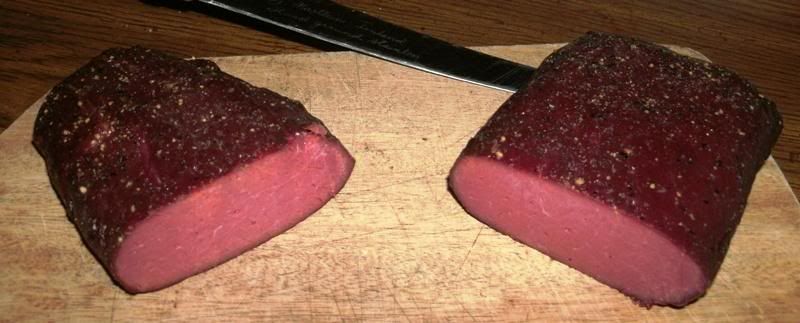
At this point, I let the roast cool down in the oven for a couple-three hours, until there was no appreciable heat to it, then put it in a ZipLock bag with the air pressed out and placed it in the refrigerator for the rest of the evening and the next day. When I got home from work, I was eager to see how it turned out, and also to try out my new meat slicer. I removed the venison from the refrigerator and took it out of the ZipLock. There were a few drops of residual moisture that had settled to the bottom of the bag, but only a few, and there's how the roast looked:
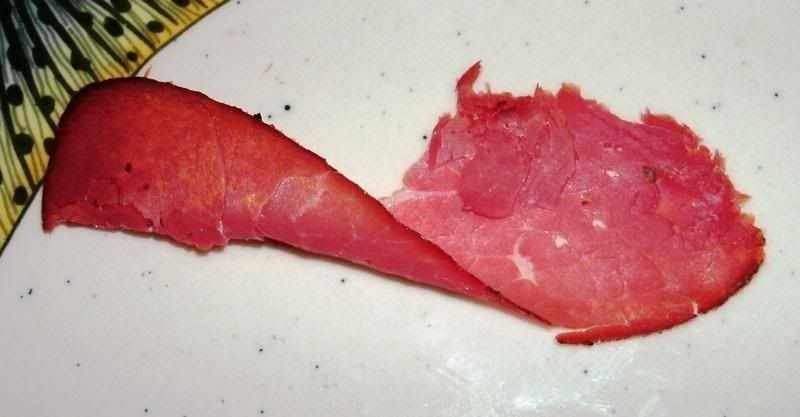
I set up my slicer, and then cut the roast in half so that slicing would be easier (from the middle-out, so to speak): Looks pretty good! It reminded me a lot of the gravlax project I did: http://foodsoftheworld.activeboards.net/a-new-gravlax-project_topic1105.html - http://foodsoftheworld.activeboards.net/a-new-gravlax-project_topic1105.html As you can see, the cured meat in both cases is dry, yet moist; firm, yet soft. Henceforth, this product shall be referred to as "dried beef," even though it was by no means dry, and of course it isn't beef; that's simply what it's called, and that's what I'm going to call it ~ Eagerly, I began slicing; my goal was to get the thinnest slices possible, but there was a bit of a learning curve on this first slicing attempt:
However, once I got the hang of it, I was able to do pretty well:
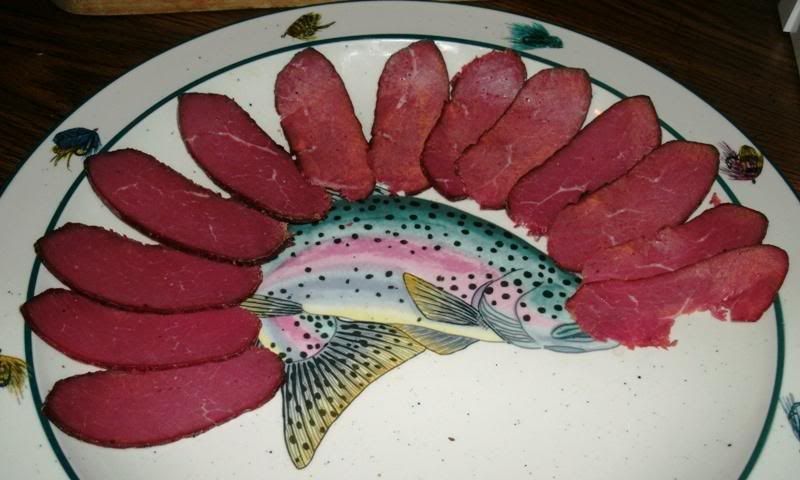
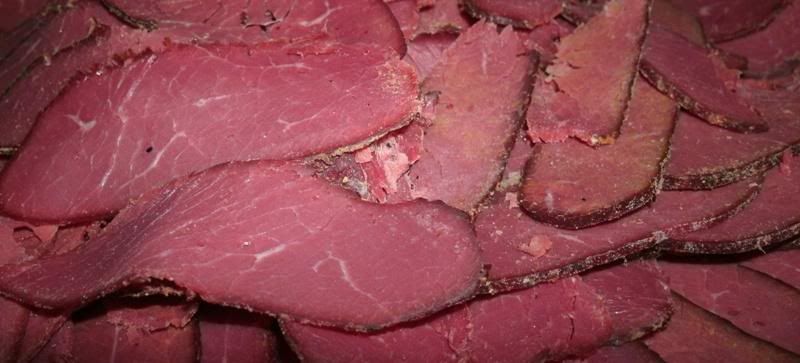
Here's the first "half" of the dried beef: 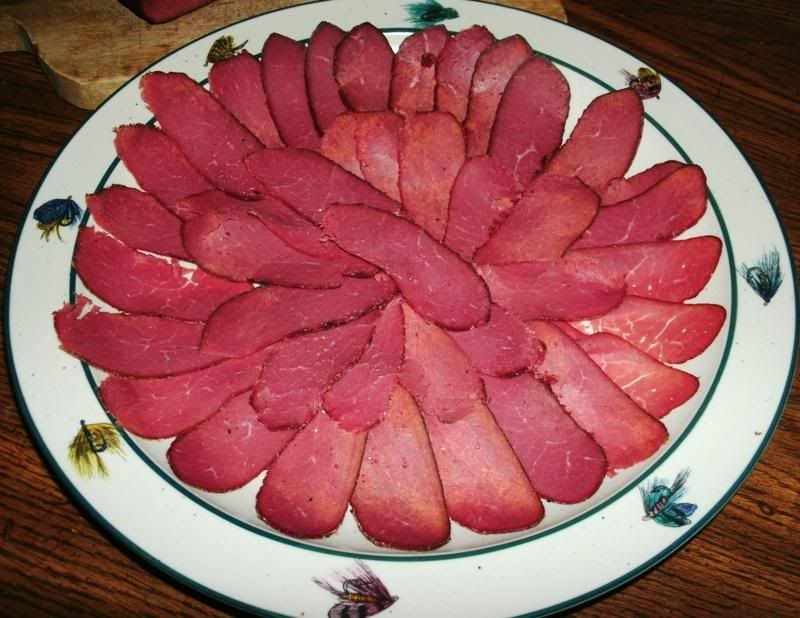 The lighter spots that you see toward the bottom are washout from the flash; also, there may be a few slices missing, as everyone was in sample mode. I tried a piece myself, and WOW this stuff came off just right. The first piece I tried was one of the thicker pieces ("thicker" is a relative term; it really was quite thin), and was impressed at the complex result of such simple ingredients: cure, brown sugar and black pepper sprinkled on the outside - that's it, and that was really all it needed for an amazing result. Then, when I tried one of the wafer-thin pieces that were nearly transparent, I was completely blown away even farther as it practically melted on my tongue into an array of flavours that seemed to come from all sides. This stuff is wonderful, and certainly not the same "chipped beef" that we loved (or hated) as kids! I continued to slice until both halves were finished:
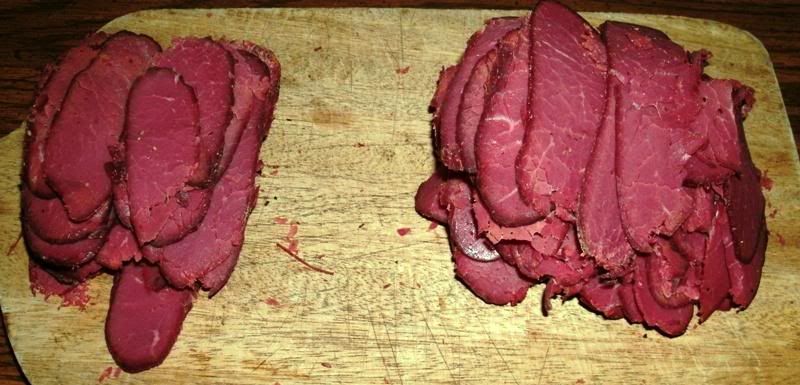
And then separated the slices into two piles based on thickness:
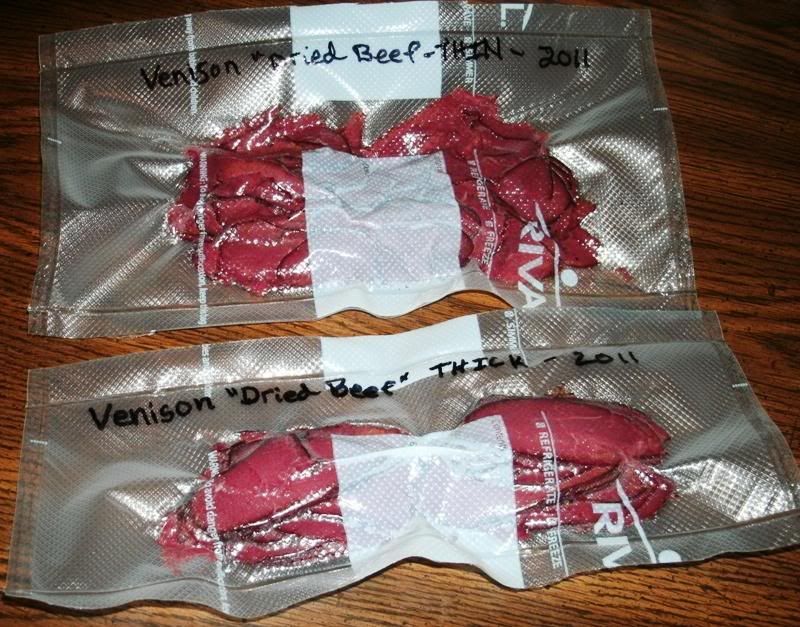
I wanted to keep the magnificent, super-thin stuff separate, so that I could lay those wonderful slices of goodness out on a meat-and-cheese tray sometime. The other pile will be used for sandwiches, or perhaps chopped and worked into a white sauce and put over biscuits, in the not-too-distant future. I then vacuum-sealed the packages:
And put them in the freezer. I cannot say too many good things about this product. It is easy, tastes great, and is a good use of venison. It's also versatile, as the preserved meat can be eaten on it's own or worked into nearly any dish. It's similar to ham, but with flavours, properties and character all its own. Naturally, this process can also be used with just about any meat, including, of course, beef; any meat that can be cured can be given the "dried beef" treatment. That pretty much concludes my venison "dried beef" tutorial, and it is certainly one for the books! I cannot recommend this stuff enough, and am very glad that I took the leap into trying it. It was new territory for me, and I will admit there was a huge satisfaction at putting out something so good at the first attempt. Thank you for looking, and I hope that you are inspired to try this. I believe I covered the process quite well, but if anyone has any questions at all, please ask. ------------- If you are a visitor and like what you see, please http://foodsoftheworld.activeboards.net/registration_rules.asp?FID=0" rel="nofollow - click here and join the discussions in our community! |

Posted By: Hoser
Date Posted: 29 December 2011 at 02:00
|
Looks terrific Ron...the texture appears to be right on. Are you going to be making some SOS with it? I love that stuff!  ------------- Go ahead...play with your food! |
Posted By: TasunkaWitko
Date Posted: 29 December 2011 at 07:05
|
oh, i think that could be arranged!
------------- If you are a visitor and like what you see, please http://foodsoftheworld.activeboards.net/registration_rules.asp?FID=0" rel="nofollow - click here and join the discussions in our community! |
Posted By: HistoricFoodie
Date Posted: 24 February 2012 at 11:36
|
Wow, Ron! What a great looking piece of meat.
I'm also one of those crazies who likes creamed chipped beef on hot toast points (which is what the Navy calls it). So this one goes in the memory file to be tried next season.
Am I the only one who adds cheese to the white sauce when making SOS?
|
Posted By: TasunkaWitko
Date Posted: 24 February 2012 at 11:53
|
i've tried it, adding a little shredded cheddar to a white sauce that i made once for something. cheddar, american or swiss would really be good with this, i think.
say, if you liked this, check out a few of those related projects taht are linked in the posts above - then get a bag of tenderquick and a roast (venison, beef, mutton, turkey, even pork) and give it a shot! ------------- If you are a visitor and like what you see, please http://foodsoftheworld.activeboards.net/registration_rules.asp?FID=0" rel="nofollow - click here and join the discussions in our community! |
Posted By: HistoricFoodie
Date Posted: 24 February 2012 at 12:06
|
Living in a rural area you'd think tenderquick would be readily available. But it's not. So I'll have to plan out several projects before ordering a bag on-line.
Around here not too many people put up their own meats, anymore, except to freeze it. And those that do prefer using their own cures. For instance, my basic cure contains salt, sugar, and black pepper. A ham would typically sit in the cure (well, "sit" isn't exactly the right word, cuz it gets handled daily) for one week per 1 1/2 pounds.
Unlike with the vacumn bag approach, we let the liquid drain away.
But I'm anxious to try your method. It's faster, for sure. And certainly neater. Plus it can be done anytime of year, whereas traditional methods are only done during cooler weather.
|
Posted By: TasunkaWitko
Date Posted: 09 October 2013 at 11:21
|
Bringing this back up to the top - since it is after all that time of year where meat - especially wild game - is made for the winter. This particular method is very easy and very delicious, but I also like it because it is a perfect "gateway" into home charcuterie. I used venison for this, but of course beef or many other meats can be used.
------------- If you are a visitor and like what you see, please http://foodsoftheworld.activeboards.net/registration_rules.asp?FID=0" rel="nofollow - click here and join the discussions in our community! |
Posted By: gonefishin
Date Posted: 06 November 2013 at 20:13
|
My word Tas! I missed this one the first time around. I imagine the venison would be a far better meat to use in this dish than beef ever was. Great idea! Thanks for sharing! ------------- Enjoy The Food! |
Posted By: TasunkaWitko
Date Posted: 08 November 2013 at 06:57
|
I haven't tried it with beef yet, but I sure love it with venison. It's easy enough, I should do a comparison! ------------- If you are a visitor and like what you see, please http://foodsoftheworld.activeboards.net/registration_rules.asp?FID=0" rel="nofollow - click here and join the discussions in our community! |